

Minimum required permission: Interaction Analytics View
View a Dataset Workspace
You can analyze your call center data in a dataset![]() Set of parsed interaction transcripts that spans a specific period of time and match your specified filter criteria. workspace. You can filter the data displayed in the workspace
Set of parsed interaction transcripts that spans a specific period of time and match your specified filter criteria. workspace. You can filter the data displayed in the workspace![]() Named view of one or more widgets. by using the filter pane or by drilling into the data in certain widgets
Named view of one or more widgets. by using the filter pane or by drilling into the data in certain widgets![]() Graphical representation of data that meets specified filter criteria.. Widgets in a workspace show a sampling of data from the dataset. You can control the size of that sample.
Graphical representation of data that meets specified filter criteria.. Widgets in a workspace show a sampling of data from the dataset. You can control the size of that sample.
-
Click My Data. Locate the dataset you want to view in the table. You can sort by any column by clicking its title. Click the dataset name to open it with its first workspace visible.
-
Adjust the size of the sample data by dragging the Sampling slider at the top of the dataset. The bar changes color to indicate projected load times. Green is the fastest and red is the slowest.
Click Info to view approximately how many interactions you are currently sampling.
If you have more than 350,000 interactions, your dataset is automatically sampled.
- Filter the dataset data to view more specific data.
- Drill down into the widgets to view more specific data and to apply filters based on the reports you see.
- To view a different dataset, click the dataset name drop-down and select the dataset you want to see.
- When you have finished viewing a dataset, close it.
Filter Dataset Data for Widgets in the Workspace
You can filter the data that appears in the widgets![]() Graphical representation of data that meets specified filter criteria. by clicking the filter icon
Graphical representation of data that meets specified filter criteria. by clicking the filter icon  on the right side of a workspace
![]() Named view of one or more widgets. page. To reset all filters applied to the dataset, click the Reset All icon in the top right corner of the Filters pane.
Named view of one or more widgets. page. To reset all filters applied to the dataset, click the Reset All icon in the top right corner of the Filters pane.
You can also apply filters to individual widgets that do not affect the data in other widgets in the same workspace.
You can filter data for any channels used by your organization. Supported channels are:
- Inbound and outbound voice
- Omnichannel
- Omnichannel and
- CXone Messaging SMS
- Digital First Omnichannel channels:
- Apple Business Chat
- Facebook Messenger
- Google Business Manager
- Line Messaging
- Microsoft Teams
- Slack
- Telegram Messaging
- Twitter Direct Messaging
- Viber
- Custom channels using the Bring Your Own Channel feature
-
Click My Data and then click the name of the dataset you want to view.
-
Do one of the following:
- To filter the data for all of the widgets in the workspace, click Filters .
- To filter the data for a single widget, locate the widget you want to filter. If the widget is already filtered, click Filters . If the filter icon is not available, click Options
 > Settings > Filters .
- To filter the data for all of the widgets in the workspace, click Filters
-
Filter by any combination of the categories that appear.
 Learn more about the filters
Filter
Description
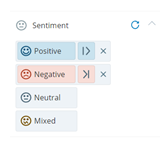
Participant Lets you view data from the agent side, contact side, or both sides of the interactions. When you drill down to view the interactions, you still see both sides. To use the filter, click the Participant drop-down and select Agent to view only agent data, Client to view only contact data, or Either to view data for the agent and the contact. Sentiment Filters the data by the Overall, Beginning, or End interaction sentiment
Overall mood or result of the interaction as determined by analysis of words, phrases, and context of the transcript. Interactions can be positive (blue), negative (red), frustrated, mixed (dark gray), or neutral (light gray).. Because all interactions have a sentiment associated with them, something must be selected. The default is to include interactions of all sentiments. To modify the sentiment filters, click the sentiment you want to view. Then select the checkbox for the interaction points you want to include. To quickly select only one interaction point, hover over it and click Only. This selects that sentiment checkbox and clears the others.You can select more than one sentiment. In the following image, the workspace will show interactions that started with positive sentiment and ended with negative sentiment.
Frustration Filters the data to only include interactions where the contact was frustrated. Resolved/Unresolved Filters the data in the workspace based on resolution status of the interaction. Select Resolved to view only resolved interaction data. Click Unresolved to view only unresolved interaction data. Click Either to view both resolved and unresolved interaction data. Behavioral Metrics Filters data to include interactions based on specific Enlighten metrics and the scores for those metrics. By default, no metrics are included. To apply a behavioral metrics filter, select one or more scoring levels for the metrics you want to see. Scoring levels are represented by face icons, such as
 for extremely negative.
This filter option appears only if you have Interaction Analytics Premium, one or more Enlighten use cases, and permission to see Enlighten metrics.
Company Profile Filters the data based on the entities configured in the company profile
Page in Interaction Analytics where you can create custom entities.. You can filter on the entity type, like product, or drill down to include entities within the entity type, such as only certain products.To include all configured entities under a single entity type, select the checkbox beside the entity type name. Clear the checkbox to remove it.
To select only certain entities under an entity type, expand the entity type and then select the checkbox next to each entity you want to include. Clear the checkbox to remove it. When you select only some entities in a type, the type checkbox turns blue but does not contain a check.
To remove all but one entity type from the applied filters, hover over the name and click Only. This selects the checkbox for that entity type and clears the others. To remove all but one entity from the applied filters, expand the entity type, hover over the name of the entity and click Only. This selects the checkbox for that entity and clears all other entities regardless of entity type.
Entities Includes or excludes interactions from the displayed data based on entities
Defined keyword or phrase, with or without variants, in an interaction or message they contain. Entity filtering is off by default.To apply a filter, type the entities you want to include or exclude in the corresponding field. Interaction Analytics will suggest pre-configured entities as you type. When you see a match, click it and then click either Include or Exclude.
To deactivate an entity filter in the list of filters, clear its checkbox or click the X.
To reset the Entities filter to the default setting, click the blue reset icon next to Entities.
Categories Filters dataset data by category
Data groups that Interaction Analytics uses for parsed call transcript data. They make it easier to find trends.. By default, workspaces display all categories in the category set Category groupings that help you use the data for a specific purpose. Out-of-the-box category templates include Intent to Buy and Risk Aversion. applied to the dataset. However, you can filter to include only categories you specify. To select categories to include, click Choose Categories. Click the name of a category to drill down to subcategories. Select the checkbox beside any category you want the workspace to include. Click Choose.
When you select a category, it includes all of its subcategories. You do not need to select them separately.
Channels Filters the data by the channel. By default, workspaces display data from all channels available in the dataset. You can filter to include data from only certain channels. Because all contacts originate from a channel, you must have something selected. Select the checkbox beside each channel you want to include. To quickly select only one channel, hover over the channel and select Only. This selects that channel checkbox and clears the others.
Company Profile Filters the data based on the entities configured in the company profile
Page in Interaction Analytics where you can create custom entities.. You can filter on the broader type, like product, or drill down to include only certain products. To include all configured entities under a single entity type, select the checkbox beside the entity type name. To select only certain entities under an entity type, hover over the entity type name and select the checkbox in the pop-up next to each entity you want to include. When you select only some entities in a type, the type checkbox turns blue but does not contain a check.To remove an entity type from the filters, clear its checkbox. To remove an entity from the filters, hover over its entity type and then clear the checkbox next to its name. To remove all but one entity type from the applied filters, hover over the name and click Only. This selects the checkbox for that entity type and clears the others. To remove all but one entity from the applied filters, hover over the entity type, then over the name of the entity and click Only. This selects the checkbox for that entity and clears the others.
Entities Includes or excludes interactions from the displayed data based on entities
Defined keyword or phrase, with or without variants, in an interaction or message they contain. Entity filtering is off by default.To apply a filter, type the entities you want to include or exclude in the corresponding field.
Some entities are pre-configuredin Interaction Analytics. They appear in the drop-down as you type so you can use them. If you want to create custom entities, you must configure them in the company profile. If you want to filter based on keywords and phrases, see the following keyword description.
To deactivate an entity filter in the list of filters, clear its checkbox. To reset the Entities filter to the default setting, click the blue reset icon next to Entities.
To remove an entity from the list of entity filters, click the X of any tag you want to remove. Click Save.
Keywords and Phrases Includes or excludes interactions from the data based on keywords or phrases
Combination of words that have special significance when used together in a specified order, such as "want to cancel". they contain. In addition to using the Keyword filter, you can apply keyword filters from the Keywords Widget. Keyword filtering is off by default.You can enter a keyword or phrase to return exact matches or variations of the keyword by clicking the down arrow on the right once you've entered a term. An exact match only returns the term or phrase exactly as you entered it. If you choose to match with variations, it also returns variations of that word. For example if you enter activate, it could return interactions that include activate, activates, activating, activated, and so on.
To apply keyword and phrases filters, type keywords or phrases you want to filter by. Select whether you want to Include, Include Any, or Exclude the keywords or phrases. Select whether you want an Exact Match or a Match with Variations.
To deactivate a keyword or phrase in the list of filters, clear its checkbox. To deactivate all but one keyword or phrase from the list of filters, hover over the keyword or phrase you want to keep and click Only. The chosen keyword remains selected and the other keywords are cleared. To reset the Keywords filter to the default setting, click the blue reset icon next to Keywords. To reactivate a keyword or phrase, select its checkbox.
To remove a keyword or phrase from the list of keyword filters, click the X of any you want to remove.
Metrics Filters by NICE CXone metadata fields. You can view data that contains certain values for the specified data field. To apply metric filters, select the Field by which you want to filter your workspace data. If you select a field that requires an integer, enter the Value and select from the operator drop-down:
- Equals—data appears in the workspace if the value for the field is equal to the specified Value.
- Greater Than—data appears in the workspace if the value for the field is higher than the number specified in Value.
- Less Than—data appears in the workspace if the value for the field is lower than the number specified in Value.
- Greater Than or Equal To—data appears in the workspace if the value for the field is either higher or the same as the number specified in Value.
- Less Than or Equal To—data appears in the workspace if the value for the field is lower or the same as the number specified in Value.
To remove filters from the Metrics filters, click the blue minus (-) icon next to the filters you want to remove.
Readability Filters data to include only interactions with high or low confidence rating and the insights derived from them. By default, all transcripts are included. To apply a readability filter, click High, Low, or Either. To restore all transcripts, click the Undo icon.
Filtering by high confidence will likely return transcripts with errors, but with a higher level of readability than that of lower quality transcripts.
Behavioral Metrics Filters data to include interactions based on specific Enlighten metrics and the scores for those metrics. By default, no metrics are included. To apply a behavioral metrics filter, select one or more scoring levels for the metrics you want to see. Scoring levels are represented by face icons, such as
for extremely negative.This filter option appears only if you have Interaction Analytics Premium, one or more Enlighten use cases, and permission to see Enlighten metrics.
-
If you want to filter the data by a specified time period, select the Date Range: drop-down at the top of your screen. By default, widgets display data from the past seven days. You can customize the time period so the widget displays data from other time periods
Learn more about available time periods
Field
Details
Date Range Displays data from start date and end date of the data as defined in the dataset. Today
Displays data from 12:00 AM today to now.
Yesterday Displays data from the past 24 hours. Last Seven Days Displays data from the last week. Custom Time Range Displays data from a time range you specify. By default, the custom end time is now. You can modify the start time to be any of the following:
- Beginning of Today — Sets the start time to 12:00 AM today.
- Yesterday — Sets the start time to 12:00 AM yesterday.
- One Week Ago — Sets the start time to 12:00 AM seven days ago.
- Two Weeks Ago — Sets the start time to 12:00 AM 14 days ago.
- 30 Days Ago — Sets the start time to 12:00 AM 30 days ago.
-
Specific Date and Time — The calendar and time fields allow you to select a specific date and time for the date range to begin. Select the date by using the single arrows to navigate by month and the double arrows to navigate by year.
Click the day you want to select. Select the hour, minutes, and AM or PM in the time drop-downs.
To reset a filter to the default setting, click Reset.
-
If you want to save the filter criteria as a category, click Save as Category.
-
Click New Category From Filters to edit the category's name.
-
Refer to Manage Category Rules for information on how to navigate the category editor.
If you make any updates in the category editor, the dataset will be different from what was previewed in your workspace.
-
Once you have made your changes, click Save as Category.
The new category will be saved under dataset categories and can be applied at any time.
-