You can download a CSV file containing a table of your existing employees and their settings. Modify this file to quickly change settings for your existing employees and to add new employees. Alternatively, you can create employees one at a time.
If you want to modify your employees' contact handling settings you must do so from ACD Users.
- Click the app selector
 and select Admin.
 - Click Employees.
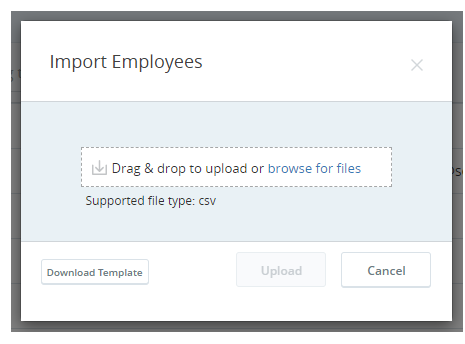
- Click Import Employees.
-
Click Download Template.
-
Open the CSV file in a spreadsheet editor like Microsoft Excel or a text editor like Notepad.
-
Modify the settings of existing employees as needed. Create new rows and enter details to create new employee profiles. Each new employee needs at least a Username, Email Address, First Name, Last Name, Role Name, and Team Name.
 Learn more about fields in this step
Field
Details
Username The ID of the user. If you're editing an existing employee, you can't change this setting. If you're creating a new employee, the ID must be either an email address or just follow the format of an email address. You can use the same value for Username as Email Address if you want to. Email Address A valid email address associated with the employee. This is where CXone sends activation invitations, password verification codes, and so forth. You can use the same email address for more than one employee. When you edit an employee's email address, a verification email is sent to the new email address. Mobile Number The employee's mobile or cell phone number, for your records only. CXone doesn't use this information. Time Zone The employee is automatically assigned to the tenant time zone unless you specify something else. Hire Date The date you hired the employee, for your records only. CXone doesn't use this information. Rank
This field only appears if you have WFM in your environment. It determines priority when creating a schedule.
Invite For new employees, enter True to automatically send an activation email to the employee when the file upload completes. Otherwise, enter False. If you don't send the invitation on file upload, you will need to do so manually from the Employees table. ACD Login ID A unique ID that lets an employee connect to a contact center. This also helps map ACD events to activities. Role Name The role assigned to the employee. CXone comes with up to four roles: Agent, Manager, Administrator, and Evaluator (if your organization uses CXone QM). Team Name The team the employee belongs to. OS Login The operating system the employee uses. The CXone Recordingapplication requires this information for screen recording. The field accepts free text and may contain a text string related to an operating system such as Windows10. MFA Secret Pairs the employee account in CXone with an MFA device that employees use to generate a one-time password (OTP). CXone allows you to generate an MFA secret either manually or automatically. For more information, see MFA Secrets. MFA Time Period For TOTP MFA, the maximum number of seconds the MFA code is available before it changes. Enter a value between 15 and 300 seconds. It must be compatible with the virtual or hardware MFA device your employees use. For example, Google Authenticator only allows a value of 30 seconds. External Identity If you want to authenticate the employee using a SAML-based login authenticator, enter the email ID that is used as the external identity (IdP) of the user in Okta. For more information, see Set Up a Federated Identity Login Authenticator. Can Be Coached Or Evaluated Only visible if your system includes CXone QM. It enables the employee to be evaluated. You will be billed for CXone QM for this employee.
This is selected by default for new employees. If you add CXone QM to a system that has existing users, you must manually enable this setting for those users.
Can Be Scheduled Only visible if your system includes CXone WFM. It enables the employee to be scheduled. You will be billed for CXone WFM for this employee.
This is selected by default for new employees. If you add CXone WFM to a system that has existing users, you must manually enable this setting for those users.
Users who don't have this attribute selected won't appear in employee lists when creating weekly rules or shift templates.
Removing this attribute from a user deletes that user from any weekly rules or shift templates to which they are assigned.
Can be Recorded (Voice) This attribute appears only if your system includes CXone Recording/CXone Recording Advanced. It enables the employee's voice to be recorded, and you will be billed for voice recording for this employee.
The default value is selected for new employees. If you add CXone Recording/CXone Recording Advanced to a system that has existing users, you must manually enable this setting for those users.
Can be Recorded (Screen) This attribute appears only if your system includes CXone Recording Advanced. It enables the employee's screen to be recorded, and you will be billed for screen recording for this employee.
The default value is selected for new employees. If you add CXone Recording Advanced to a system that has existing users, you must manually enable this setting for those users.
Can Be Analyzed Only visible if your system includes Interaction Analytics. When this attribute is selected, the employee's recorded interactions are analyzed by Interaction Analytics. You will be billed for Interaction Analytics for this employee.
This is not selected by default for new employees.
City Only required if your system includes the CXone ACD and is site-dependent. State Only required if your system includes the CXone ACD and is site-dependent. Country Only required if your system includes the CXone ACD and is site-dependent. Assigned To Scheduling Unit Only available if your system includes CXone WFM. It allows you to specify the scheduling unit for an employee. Assigned To Groups The logical groups the employee belongs to.
Assigned To Skills Only available if your system includes CXone WFM, CXone QM, or both. It allows you to assign one or more WEM skills to an employee. -
Save the file.
-
Return to the Import Employees page in CXone.
-
In the Import Employees window, drag and drop the CSV file you saved in the indicated area.
-
Click Upload. CXone redirects you to the Bulk Upload Portal where you can see the file upload progress on the Activity tab.
You can navigate away from this page if you want. You will receive notification in Notification Center (the bell icon in the title bar) when the upload completes. You can click the notification to go to the Bulk Upload Portal and see details.
-
If the upload failed due to errors in the file records, click Review Errors. Fields with erroneous values are marked in red and have instructions to help you correct the values. Open the CSV file, correct the errors, save the file, and upload the file again.