

Login authenticators (password policies) establish the parameters and rules for passwords that your users can create to access NICE CXone. In addition to the default login authenticator, you can create the following types of login authenticators and apply them to different user roles:
- Custom login authenticators for your organization (tenant)
- External Identity (IdP) or single sign-on (SSO) based login authenticators
The default login authenticator for CXone requires that passwords:
- Have a minimum of six characters
- Include at least one lowercase letter
- Include at least one uppercase letter
- Include at least one number
Under the default login authenticator, special characters may be used in a password but are not required.
Key Facts About Login Authenticators
- Every tenant must have a login authenticator. If you do not use a custom or external identity-based login authenticator, the default login authenticator automatically applies.
- When the login authenticator is modified, changes become effective as soon as they are saved. Users who are logged in at the time of the change are not affected but are redirected to change their password upon their next login if their password does not meet the requirements of the new login authenticator.
-
For custom login authenticators:
-
You can specify the number of days the password is valid. After the specified number of days, the users in the relevant role are prompted to change their passwords.
-
You can specify the number of previous passwords that CXone remembers. Users cannot reuse passwords that CXone remembers.
-
If a user enters the wrong password six times, the account is locked for 30 minutes. As an administrator, however, you can unlock user's account sooner than 30 minutes.
-
If a user forgets the password, the user can request a password reset link to be sent by email.
-
Configure a Custom Login Authenticator
You can create a custom login authenticator for each role. After you configure a login authenticator for a particular role, the password field displays the configured login authenticator rules when a user tries to set or change the password.
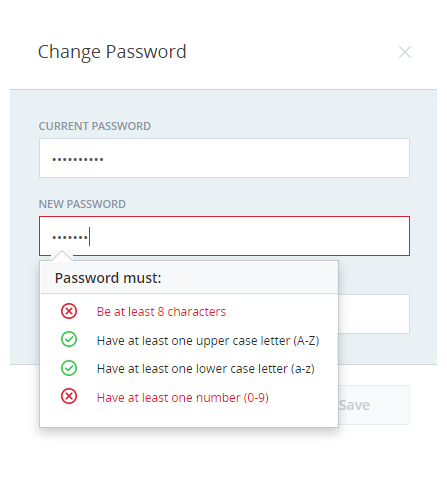
As the user types in the password, CXone displays the login authenticator rules. CXone evaluates the entered password as per the login authenticator rules and color codes the rules in real time. Login authenticator rules that the password meets appear in green and are marked with a checkmark. Login authenticator rules that are not met appear in red and are marked with X.

- Click the app selector
 and select Admin.
 - Click Security > Login Authenticator.
- Click New Login Authenticator.
- Enter the Name and Description of the login authenticator.
- Select System as the Authentication Type.
- Select the checkboxes for the Password Complexity parameters you want to apply. You can choose one or all of the following options:
- Require Lower Case (a-z)
- Require Upper Case (A-Z)
- Require Numeric (0-9)
- Require Non-Alphanumeric (!, @, #, etc.)
- You can select the checkbox to Require Multi-factor Authentication (for more information, see Multi-Factor Authentication). Select the MFA Type you want from TOTP (time-based) or HOTP (counter-based).
- Select the minimum number of characters needed from the Minimum Password Length drop-down. The minimum value is 6 and the maximum value is 20.
-
Select the checkbox and select the number of days a password is valid in the Enable Password Age drop-down. The minimum value is 10 and the maximum value is 365.
-
Select the checkbox and select the number of previous passwords that are CXone remembers from the Enable Password History drop-down. The minimum value is 1 and the maximum value is 50. Users cannot reuse a password that CXone remembers.
-
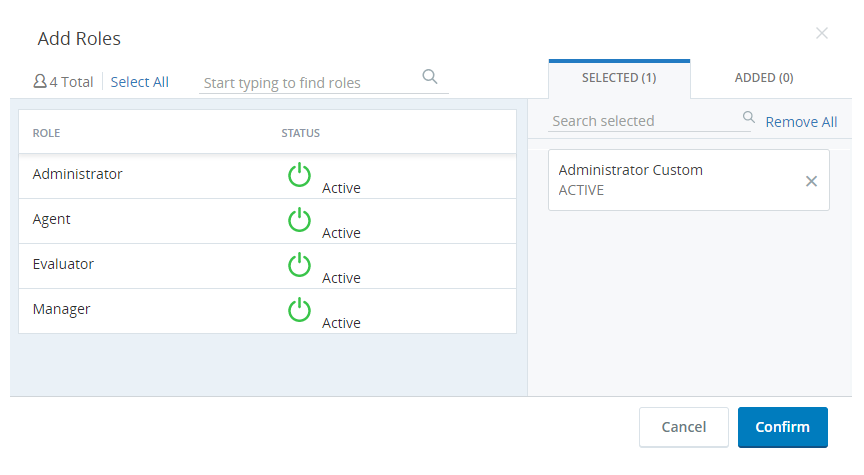
Select the Assigned Roles tab and click one or more roles under All Unassigned Roles to assign them the login authenticator you are creating.
-
When you are finished configuring the login authenticator, click Save & Activate.
Set Up a Federated Identity Login Authenticator
You can use external authentication for single sign-on (SSO) in a login authenticator. SSO allows users to access multiple resources using single, federated authentication. CXone supports SSO by implementing federated authentication through Security Assertion Markup Language (SAML) version 2.0.
You can set up IdP-initiated authentication or SP-initiated authentication with the following steps.
IdP-Initiated Authentication—IdP stands for external identity provider. IdP-initiated authentication means that the external identity provider starts the login process with CXone.
SP-Initiated Authentication—SP stands for service provider. SP-initiated authentication means that CXone starts the login process with the external identity provider.
You can use any SAML 2.0 based external IdP with CXone. The following instructions use Okta Identity Cloud as an example.
- Ensure that you have an okta.com admin account.
- In CXone, generate and copy an ACS (Assertion Consumer Service) URL:
- Click the app selector and select Admin.
- Click Security > Login Authenticator.
- Enter the Name and Description of the login authenticator.
- Select SAML as the Authentication Type .
- Enter the SAML request Endpoint as the Endpoint URL.
- Click Choose File and select the signing certificate from your identity provider.
- Click Save and Activate.
- Open the login authenticator.
Note the ACS URL and Entity ID. You will need to provide your identity provider with both values.
- Click the app selector
-
To allow Okta IdP to recognize requests that CXone sends, create a SAML 2.0 application for authentication and download the Okta Certificate.
- Log in to okta.com using admin credentials and create an application.
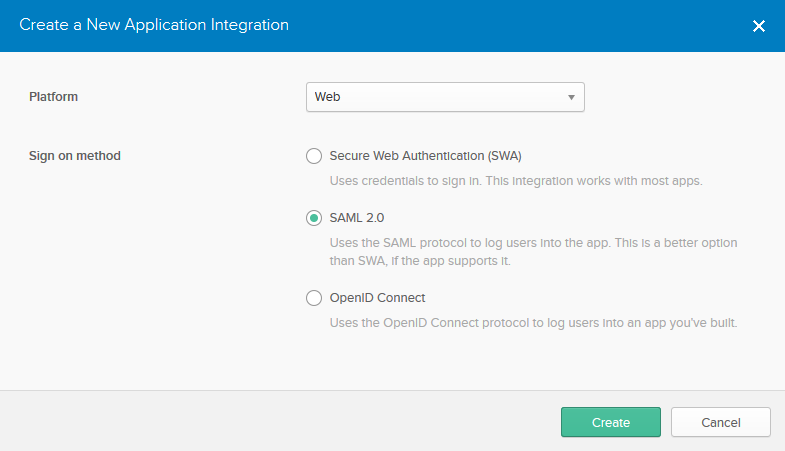
- In the General settings of the application:
- Enter a Name of the SAML application.
- Set the Platform to Web.
Set Sign On Method to SAML 2.0.
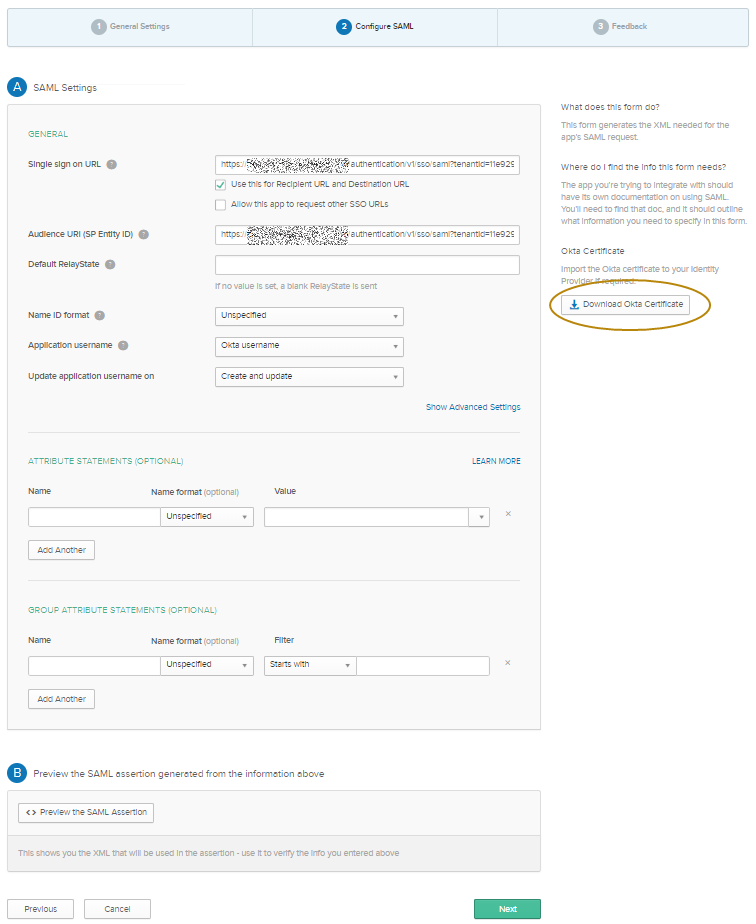
- Click Next and in Configure SAML:
- Paste the ACS URL in Single Sign On URL.
- Select Use this for Recipient URL and Destination URL.
- Paste ACS URL in Audience Restriction.
Click Download Okta Certificate.
- Rename the downloaded Okta certificate with a PEM extension.
- Ensure that the certificate has these headers:
-----BEGIN CERTIFICATE-----
<data>
-----END CERTIFICATE-----
- Create a user account and associate the user account with the application. The email ID used in this account should be added to the Employee profile.
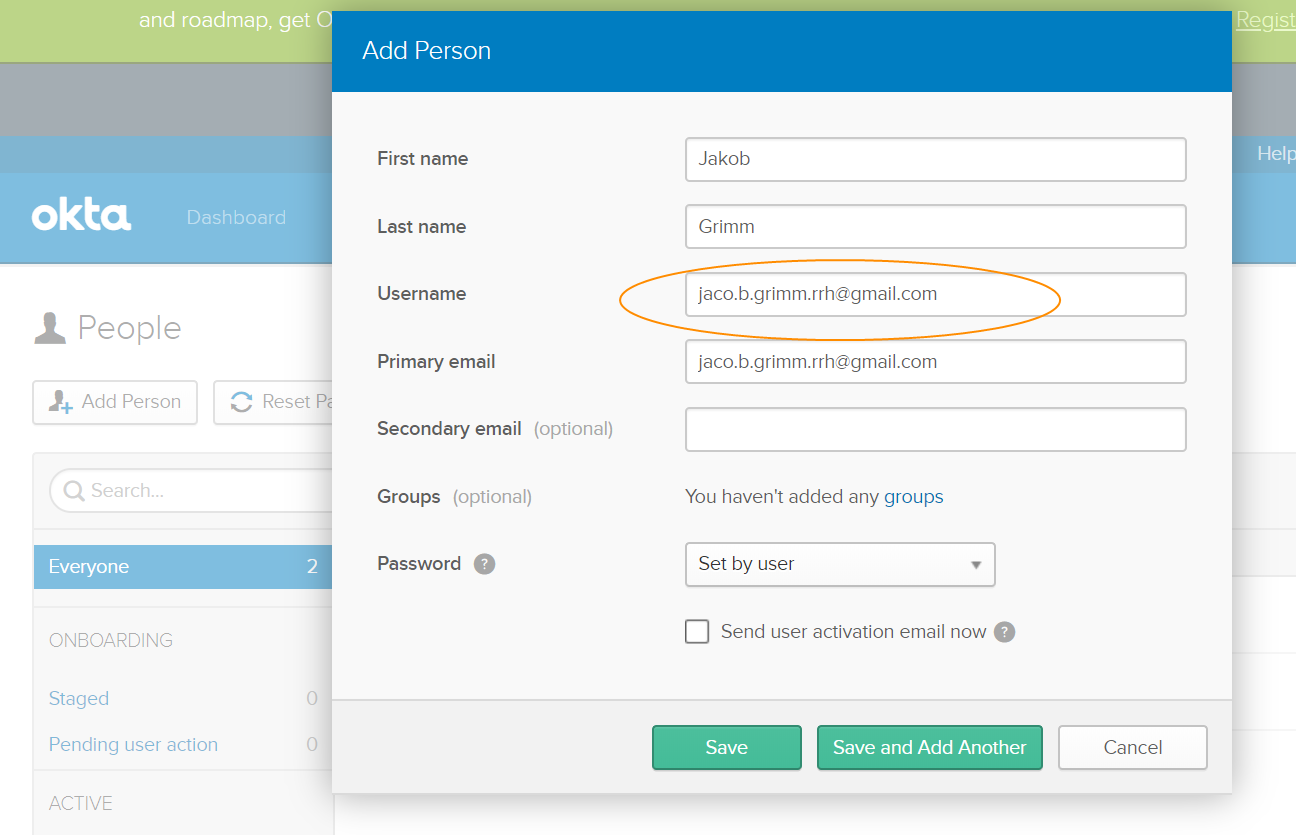
- Go to Dashboard in the okta application you created and select Add People.
Enter the employee’s details. The email ID you enter in the Username must be the same as the one you enter in External Identity in the employee profile in CXone. These fields are case-sensitive, so the entries must match exactly.
You can also use the Bulk Upload Records feature to create multiple employee accounts in CXone. While importing employees, ensure that the email ID of the employee entered in the External Identity column of the CSV template is the same as the email ID entered in the Username field of the Okta profile. These fields are case-sensitive, so the entries must match exactly.
- Invite the employee to activate the Okta account and ensure that the account is activated.
- Go to the employee’s profile in okta.com and assign the Okta authentication app you created to the employee.
- Return to the Login Authenticator screen and finish creating the login authenticator.
- Click Choose File under Authentication Provider Certificate and select the Okta certificate you downloaded from the Okta website.
- In the Assigned Roles tab, assign the roles to which the login authenticator is applicable.
- Click Save & Activate.
- Ensure that the employee profile has the Okta-registered email ID entered in the External Identity field. For more information, see Create Employee Accounts.
- Notify employees to go to their Okta accounts to log in to CXone. The URL to log in to CXone using Okta is in the activation email they received from the Okta website.
View Change History
The Change History tab contains a history of the profile's modifications. It displays information about the creation of the profile and the last modification and contains a table that details the individual fields modified in the profile history, including the field modified, the old value, the new value, and who made the change and when. Because the history table can become so large, you can use search and filter tools to limit the table's contents based on certain text or based on a specific time period.
The change history page displays:
- List of all changes made to the profile including old and new values
- The date of the change
- Name of the person who made those changes
You can search through the changes to locate any specific values. For more information, see Change History Tab.
Change History Tab
Details
- Created By
- The name of the user who created the profile.
- Created Date
- The date and time at which the profile was created. It follows the format [M]M/[D]D/YYYY [H]H:MM AM/PM.
- Last Modified By
- The name of the user who last modified the profile.
- Last Modified Date
- The date and time at which the profile was last modified. It follows the format [M]M/[D]D/YYYY [H]H:MM AM/PM.
Search Tools
- Search
- Filters the table based on the text you type in the Search field.
- Start Date
- The first date in the date range you want to view. The start date field is the date picker text box on the left.
- End Date
- The last date in the date range you want to view. The end date field is the date picker text box on the right.
- Set
- Filters the table by the selected date range. After you select a time range with the Start Date and End Date fields, the Set button filters the table to only include actions that occurred on the profile during the specified time period.
- Cancel
- Changes the default date range of the data in the table to entries within the last month.
Table Columns
- Date
- The date and time at which the modification occurred. It follows the format [M]M/[D]D/YYYY [H]H:MM AM/PM.
- Modified By
- The name of the user who made the modification.
- Changed Field
- The name of the field modified.
- Old Value
- The value of the field before the modification.
- New Value
- The value of the field after the modification.