

Add Users to an ACD Skill or DFO Routing Queue
-
Click the app selector
 and select ACD.
 -
Go to Contact Settings > ACD Skills.
-
Click the skill
 Used to automate delivery of interactions based on agent skills, abilities, and knowledge you want to edit.
 -
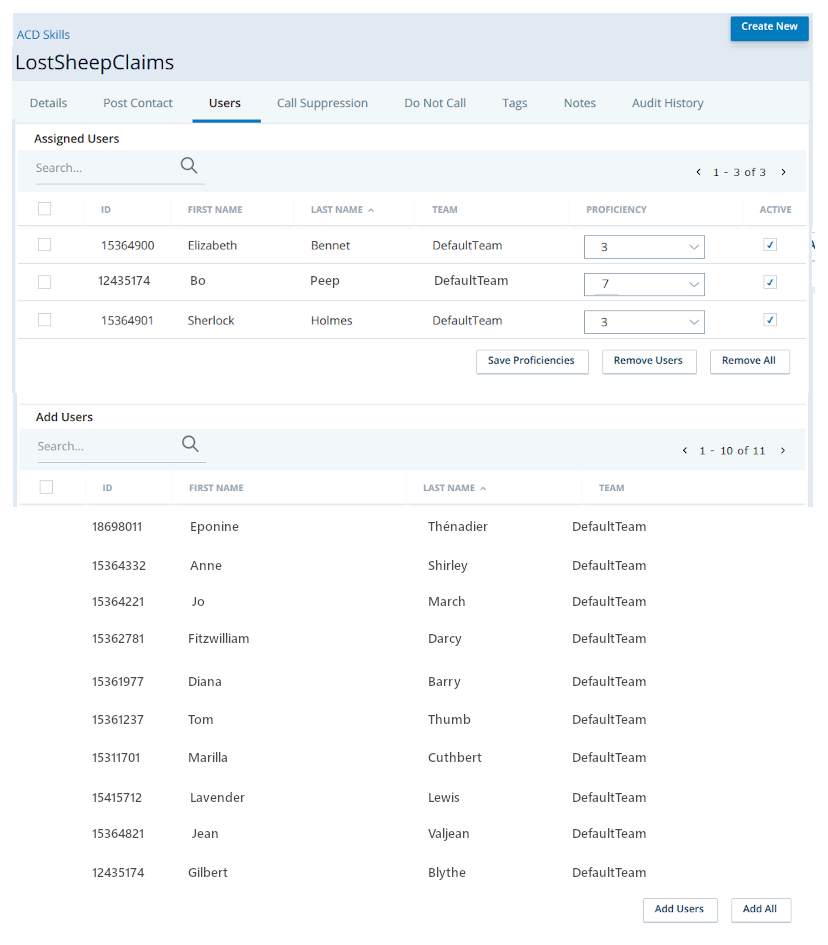
Click the Users tab.
-
In the Add Users table, select the checkboxes in the rows of the users you want to add and then click Add Users. To quickly add all users to the skill, click Add All.
-
For each user you added, click the drop-down in the Proficiency column and select the proficiency level you want to apply to each user. When the proficiency levels for all new users are how you want them, click Save Proficiencies. A proficiency level of 1 indicates the highest (best) proficiency; larger numbers represent less proficiency.
If you don't click Save Proficiencies before leaving the page, all users you added to the skill are removed from it.
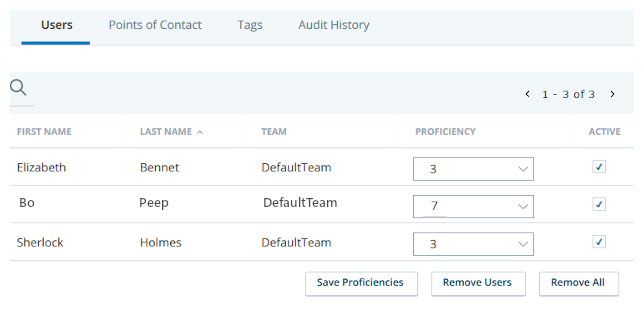
Change User Proficiency in a Skill
Remember, a proficiency level of 1 indicates the highest (best) proficiency; larger numbers represent less proficiency.
-
Click the app selector
and select ACD. -
Go to Contact Settings > ACD Skills.
-
Click the skill
Used to automate delivery of interactions based on agent skills, abilities, and knowledge you want to modify. -
Click the Users tab.
-
In the Assigned Users table, find the user you want to modify and click the drop-down in the Proficiency column. Select the new level you want the user to have. Repeat for each user you want to modify.
- Click Save Proficiencies.
Identify the Caller ID of an ACD Skill
-
Click the app selector
and select ACD. -
Go to Contact Settings > ACD Skills.
-
Click the skill
Used to automate delivery of interactions based on agent skills, abilities, and knowledge you want to view. -
In the Details tab, look for the CallerID field. If there is no CallerID field, the skill uses the global caller ID configured for the tenant
High-level organizational grouping used to manage technical support, billing, and global settings for your CXone environment. If the field is present, the skill uses a custom caller ID and its value appears beside the field.
Manage Do Not Call Settings
Outbound phone skills must have an assigned do not call (DNC) list. By default, all outbound phone skills are assigned to the default DNC list for your tenant![]() High-level organizational grouping used to manage technical support, billing, and global settings for your CXone environment. DNC lists do not apply to inbound phone skills.
High-level organizational grouping used to manage technical support, billing, and global settings for your CXone environment. DNC lists do not apply to inbound phone skills.
-
Click the app selector
and select ACD. -
Go to Contact Settings > ACD Skills.
- Click the outbound phone skill to open it.
- Click the Do Not Call tab.
- If you want to use the default
- If you're setting up a Personal Connection skill, use the tables to specify all the contributing and scrubbing DNC groups you want to apply.
- Click Save.
Set Up Call Suppression
You can temporarily suppress calls or messages to certain contacts for reasons other than a do-not-call request.
-
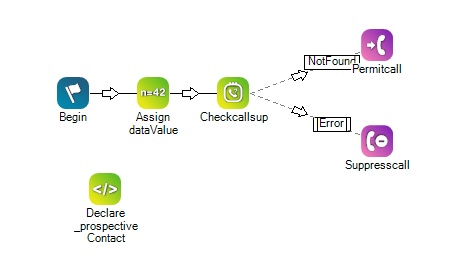
If you want more than the basic call suppression functionality, or if you want to take advantage of the script's timing to automate some actions before an agent receives the call, create a call suppression script in Studio. To do so, create a phone script that includes at least the CheckCallSup, PermitCall, and SuppressCall actions.
View image
The default automatically generated script in Studio looks like this:
-
Click the app selector
and select ACD. -
Go to Contact Settings > ACD Skills.
-
Click the
Used to automate delivery of interactions based on agent skills, abilities, and knowledge you want to modify. -
Click the Call Suppression tab.
- Click Edit.
-
If you already created a script, select it from the Script drop-down.
-
If you didn't create a script in Studio, create one now. To do so:
-
Click Create a New Script.
-
Enter a Script Name. Enter the name of the column in the calling list you want to use as criteria for call suppression in the Field Name field. For example, you could have the script check for certain values in a ZipCode column to suppress based on location.
-
Click Create.
-
-
Click Save.
Your new call suppression script is accessible in Studio. If you have Studio permissions, you can open the script in Studio to modify it. For example, you can change the mapped calling list column or take advantage of the script's timing to perform other actions as described earlier in this process.
- Add records to call suppression as needed.