In the Studio application, a script is a network of actions![]() Performs a process within a Studio script, such as collecting customer data, playing a message or music, or routing a contact to an agent. that route and manage customer traffic for a contact center. For example, if a customer calls into a contact center, the customer interacts with an inbound phone script that directs the caller to the appropriate department based on their reason for calling. Each action in the script has a specific purpose. Examples include: setting skills or variables, playing on-hold music, or passing along customer information. These actions link together via connectors. Connectors determine possible "pathways" for the caller to navigate through the script. Scripts can range from simple to extremely complex. A simple script might only have a few actions to route a caller to an agent. A complex script might have multiple branches for different languages, many actions to set and manage variables, references to subsequent scripts, and much more.
Performs a process within a Studio script, such as collecting customer data, playing a message or music, or routing a contact to an agent. that route and manage customer traffic for a contact center. For example, if a customer calls into a contact center, the customer interacts with an inbound phone script that directs the caller to the appropriate department based on their reason for calling. Each action in the script has a specific purpose. Examples include: setting skills or variables, playing on-hold music, or passing along customer information. These actions link together via connectors. Connectors determine possible "pathways" for the caller to navigate through the script. Scripts can range from simple to extremely complex. A simple script might only have a few actions to route a caller to an agent. A complex script might have multiple branches for different languages, many actions to set and manage variables, references to subsequent scripts, and much more.
The basic workflow for developing a script begins with drag and dropping actions from the Tools or Framework tabs onto the canvas. Then, connecting the actions to determine the possible pathways of the interaction flow. After creating the network of actions, you can configure each action by adding additional parameters, custom programming logic, or uploading prompts to be played.
Most all script handling is performed in Studio. CXone provides basic methods of script interaction, such as creating script schedules or reverting a script back to a previous version.
Scripting Interface Elements

The preceding image provides a look at the Studio user interface. The large center pane is the primary work area called the canvas. Here you place and interact with actions to create your script. Studio offers a variety of tabs, or windows, that you can open and arrange in the panes around the canvas. These tabs provide access to the components you need to create and manage scripts. In this image, the Tools tab appears in the pane on the right, the Navigate tab appears on the left, and the Script Errors tab appears beneath the canvas. You can click and drag actions from the Tools and Framework tabs (in the right-pane of the image) onto the canvas to build a script. Note that the Framework tab must be specifically enabled by an internal administrator.
Script Types
You can create a specific type of script that correlates with the different channels in your contact center, which are shown below:
When creating a new script, Studio prompts you to determine the type of script that you want to create. The type of script you choose must correlate with the type of routing that you wish to achieve. Most actions function in any script type, however, some can only be added to a specific script. For example, ASR![]() Allows contacts to respond to recorded voice prompts by speaking, pressing keys on their phone, or a combination of both. actions function with phone scripts. If you try to use an action from the Framework tab that is not compatible with the script type that you are creating, Studio displays an error message. Additionally, actions that are not compatible with a certain script type will not appear in the Tools tab of that script.
Allows contacts to respond to recorded voice prompts by speaking, pressing keys on their phone, or a combination of both. actions function with phone scripts. If you try to use an action from the Framework tab that is not compatible with the script type that you are creating, Studio displays an error message. Additionally, actions that are not compatible with a certain script type will not appear in the Tools tab of that script.
In addition to these main script types, Studio offers a few script templates depending on the features and applications you have enabled with your system, such as the call suppression script related to Personal Connection. If you have access to these templates, they are accessible in the Available Templates section of the Create New Script dialog.
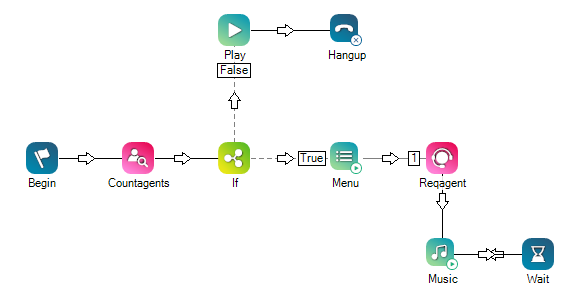
In this script, the system counts the number of available agents. If that number is zero, then a message plays and the system disconnects the call. If the number of available agents is greater than zero, then an IVR![]() Automated phone menu that allows callers to interact through voice commands, key inputs, or both, to obtain information, route an inbound voice call, or both. menu offers the caller the option to connect to an agent. Until an agent comes on the line, music plays for 30 second intervals. Again, most of these actions are available to use in any script type, however the Hangup action is specific to Phone scripts.
Automated phone menu that allows callers to interact through voice commands, key inputs, or both, to obtain information, route an inbound voice call, or both. menu offers the caller the option to connect to an agent. Until an agent comes on the line, music plays for 30 second intervals. Again, most of these actions are available to use in any script type, however the Hangup action is specific to Phone scripts.
Connectors and Branches
Connectors
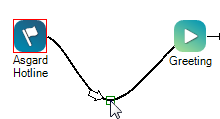
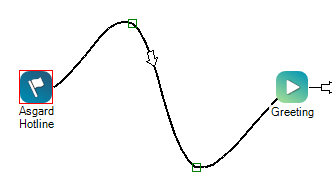
A connector is an individual connection between 2 actions. It displays as an arrow and determines the possible movement of a contact, plus the condition for a contact following that connector. You can connect 2 actions by clicking the bottom-right corner of an action and dragging and dropping the connector to the next action in the flow. To help keep your script clean and organized, you can bend connectors by:
- Pressing and holding CTRL and SHIFT on your keyboard.
- Hovering over the connector so that it turns blue.
- Rightvclicking on the connector to place a green box (which will be a pivot point).
- Left clicking the green box and maneuvering the connector as desired.
Branches
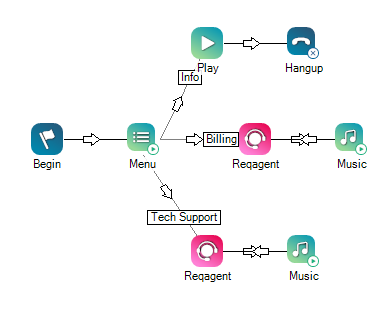
A branch is a path that divides a script into 2 or more subdivisions, which begins with a single connector. Many actions contain default branch options for you to configure, such as Default or OnError, but you can also create custom branch conditions (called Variable Branch Conditions) when the PickBranch window appears after connecting 2 actions. The preceding image in the drop-down displays a basic example of 3 branches and connectors: info, billing, and tech support. The first connectors of each branch are labeled and also show the 3 menu options. Many scripts will be much more complex than shown in the example with more fleshed-out branches. If branches become too complex and extensive to intuitively fit onto 1 canvas, the scripter could separate branches into individual sub-scripts, then reference the sub-scripts from the main script using a Runsub or Runscript action. This is an excellent way to keep your scripts organized and tidy instead of large, cluttered, and confusing.
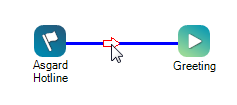
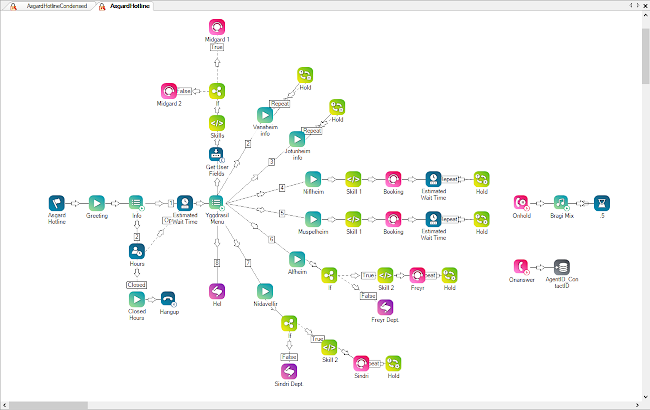
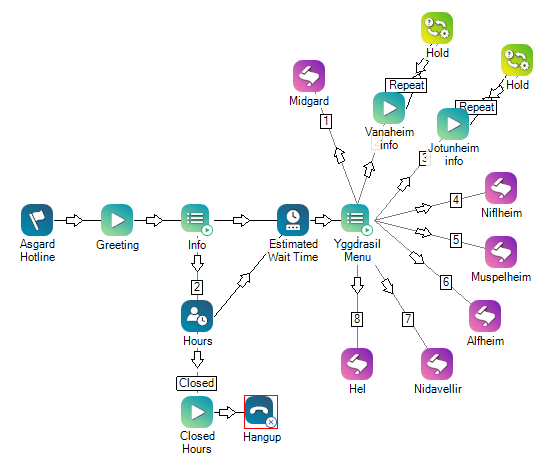
For example, in the following script images you can see that the Yggdrasil Menu provides 8 options for the 8 other Nordic worlds. Each world represents a different branch of the script. Heimdallr is the scripter for the Asgard Hotline. If he wanted to include more options for each branch, the script could become overly complex. Instead, he could create a separate sub-script for each of the 8 other worlds. After doing so, Heimdallr would use a Runsub or Runscript action for each menu option that launches the separate script when selected by the contact.
Complex:
Condensed:
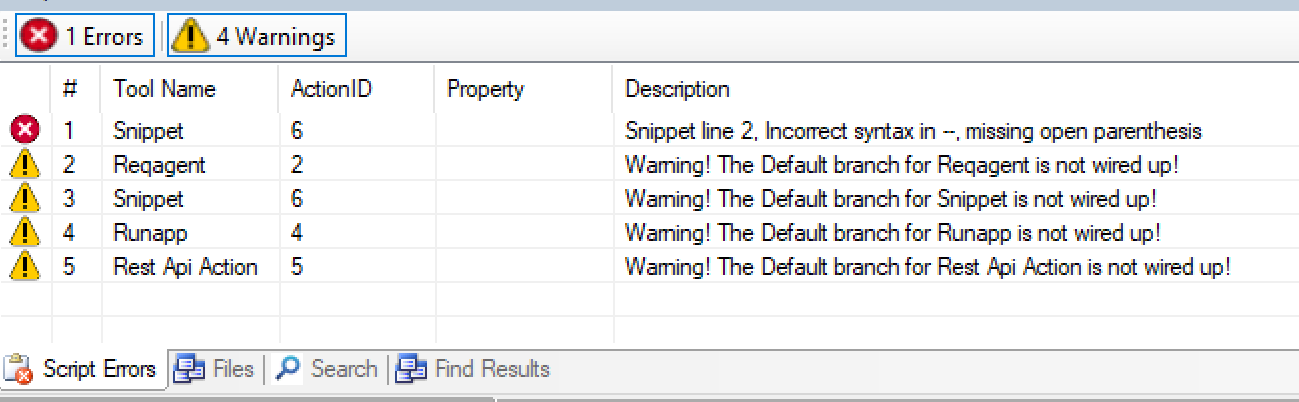
Script Errors
The Script Errors tab displays both warnings and errors that may exist in your script. Studio populates this tab after clicking the Save button. You can double-click any of the warnings or errors in this list to be directed to the action on the canvas where the issue occurs. A warning will not stop the script from running or saving , however, to avoid potential issues, best practice is to alleviate warnings before putting a script into production.
For precautionary reasons, syntax and validation errors prevent you from saving the script. If these errors are detected, Studio will display a notification window when you attempt to save the script. Validation errors may not appear in the Script Errors tab, such as invalid JSON entered in the Rest Api action, but you will receive an error notification with technical details of the error. If you attempt to save with a validation error, your script may revert back to the "last known good" version of the script, which causes you to lose changes made after your previous save.
The following are examples of issues that prevent a script from saving and an example error description:
- Incorrectly spelled variables ("Snippet Line 2. Function: NameLabel has not been defined")
- Using a function as a method parameter ("Unterminated function parameters")
- Using an incorrect data type in a method that requires a specific data type ("Unterminated function parameters")
Errors also affect script traces. If you attempt to run a script trace on an unsaved script, Studio prompts you to save the script. If you have errors in the script, the script will not save and you might lose changes caused by validation errors. The trace will run, but it will run on the last saved version of the script.
Script APIs
For more advanced script developers, you can programmatically open and save scripts to assist with automated development processes. Expand the following drop-downs to view basic details for each API.
Use v17 or earlier of GET /scripts to get a list of scripts for your
Summary: Return the XML of a script by Name or masterId.
Description: This method will returns XML of a script by Name or masterId.
Parameters:
- name: scriptPath
in: path
description: full path of script
required: true
style: simple
explode: false
schema:
type: string
- name: scriptId
in: path
description: master id of a script
required: true
style: simple
explode: false
schema:
type: integer
Responses:
'200':
description: SUCCESS
content:
application/json:
schema:
type: object
properties:
name:
type: string
description: Name of a script
filePath:
type: string
description: file path
ScriptId:
type: integer
description: MasterId
body:
type: string
description: XML of a Script
'400': description: Invalid params
'404': description: Not found
'500': description: Internal error
'501': description: Incontrol.Net Service Internal Error
Summary: Save a new script or existing script.
Description: This method will save a script into the DB using a base64 string.
Parameters:
- name: scriptPath
in: path
description: full path and the name of the Script
required: true
style: simple
explode: false
schema:
type: string
- name: body
in: path
description: 'body of the Script, this is a XML encoded in base64'
required: true
style: simple
explode: false
schema:
type: string
Responses:
'200':
description: Success
content:
application/json:
schema:
SaveScript:
type: object
properties:
ScriptId:
type: string
description: The new ScriptId generated after the save was successful
'400': description: Invalid Parameters
'405': description: Locked by someone else
'500': description: Internal Error
'501': description: Service Internal Error
Summary: Save a new script or existing script.
Description: This method will save a script into the DB using a base64 string.
Parameters:
- name: scriptPath
in: path
description: full path and the name of the Script
required: true
style: simple
explode: false
schema:
type: string
- name: body
in: path
description: 'body of the Script, this is a XML encoded in base64'
required: true
style: simple
explode: false
schema:
type: string
Responses:
'200':
description: Success
content:
application/json:
schema:
type: object
properties:
ScriptId:
type: string
description: The new ScriptId generated after the save was successful
'400': description: Invalid Parameters
'405': description: Locked by someone else
'500': description: Internal Error
'501': description: Service Internal Error
Summary: Kick a locked script.
Description: This method will force the unlock of a script.
Parameters:
- name: scriptPath
in: path
description: full path of script
required: true
style: simple
explode: false
schema:
type: string
Responses:
'200': description: Success
type: object
properties:
type: string
description: Request Date
ErrorMessage:
type: string
description: Error Message from Service
ErrorState:
type: boolean
description: Error state
KickResult:
type: string
description: Result of service
MasterID:
type: integer
description: Master ID of Script
CurrLockedBy:
type: integer
description: ID of kicked User
'400': description: Invalid Parameters, Script Already Unlocked, You Cannot Kick Yourself From Script
'404': description: ScriptNotFound
'500': description: Internal Error
'501': description: Service Internal Error
Summary: Return a history of a script.
Description: This method will return a history of a script by name.
Parameters:
- name: scriptPath
in: path
description: full path of script
required: true
style: simple
explode: false
schema:
type: string
Responses:
'200':
description: SUCCESS
content:
application/json:
schema:
HistoryScripts:
type: object
properties:
name:
type: string
description: full path of a script joined with the name
versions:
type: array
Items:
HistoryScripts_versions:
type: object
properties:
scriptId:
type: integer
description: Master ID of script
modifyDate:
type: string
description: Modify date
modifyUser:
type: string
description: Modify user
Status:
type: string
description: Status of a script
'400': description: Invalid params
'404': description: Not found
'500': description: Internal error
'501': description: Incontrol.Net Service Internal Error
get:
tags:
Summary: Search script
Description: This method will search for a script in the business unit based on keywords.
Parameters:
name: mediaType
in: query
description: Media type of the script.
required: false
explode: false
schema:
type: integer
name: scriptName
in: path
description: keyword for search
required: true
style: simple
explode: false
schema:
type: string
name: includeInactive
in: query
description: This variable is used to include the search among the inactive scripts.
required: false
explode: false
schema:
type: boolean
name: includeTrusted
in: query
description: This variable is used to include the search among trusted business units
required: false
explode: false
schema:
type: string
name: modEndDate
in: query
description: This variable is used to include the search in an established range of dates
required: false
explode: false
schema:
type: string
Responses:
'200':
description: SUCCESS
content:
application/json:
schema:
$ref: '#/components/schemasSearchScript'
'400':
description: Invalid params
'401':
description: Unautohrized. You do not have sufficient permissions
'404':
description: Script path not found
'500':
description: Internal error
'501':
description: Incontrol.Net service internal error
Components:
schemas:
GetScript:
type: object
properties:
name:
type: string
description: 'Name of the script'
filePath:
type: string
description: 'Full script path'
scriptId:
type: integer
description: 'This is the script identifier, it is unique'
body:
type: string
description: 'Script content encoded in Base63 format'
DeleteScript:
type: object
properties:
scriptPath:
type: string
description: 'Information of the full path script name that was removed'
deleted:
type: boolean
description: 'Status of the script'
error:
type: string
description: 'If an error occurs in the deletion process'
SearchScript:
type: object
properties:
type: integer
description: 'Information of the business unit'
scriptName:
type: string
description: 'Full script path'
scriptSearchDetails:
type: array
description: 'Detail of the search result'
items:
$ref: '#/components/schemas/SearchScript_Details'
SearchScript_Details:
type: object
properties:
busNo:
type: integer
description: 'Business unit number'
masterID:
type: string
description: 'Script identifier'
scriptName:
type: string
description: 'Name of the script'
status:
type: string
description: 'Status of the script active/inactive'
mediaType:
type: integer
description: 'Media type number'
modifyDate:
type: string
description: 'The date of the last modification
mUser:
type: integer
description: 'The last user who has modified the script'
actionID:
type: integer
description: 'Action identifier'
Scripting Tips & Tricks
- Renaming the caption in an action can make your script much easier to read and follow. Edit an action's caption in the Properties dialog.
- When using Menu (or a similar action), create a branch to repeat the menu options using the Loop and Noresponse actions that connect back to the Menu action.
-
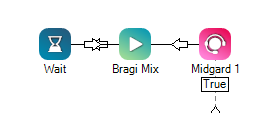
Add a Wait action after a Music action to replay the music (otherwise the audio will play for 30 seconds then end).
- Make sure you do not have a dead end. Dead ends could be issues such as missing branches in a menu, menu branches that are not configured, or (like in the preceding item) no Wait action after a Music action.
- When creating a menu, it is best to name the department first and then the number to dial/speak. Contacts are usually listening for the department name and then the number.
- Use the Annotation action to add notes or instructions throughout a script.
- Use the name of the script for the Begin action caption.
- For Play and Menu actions, double click the action and annotate the verbiage of the prompt in the Phrase field.
- View a script's history by right-clicking on the script in the Browse tab (View > Browser) and hovering over the History option. This allows you to view previous iterations of a script.