You can integrate most virtual agent![]() A software application that handles customer interactions in place of a live human agent. bots into CXone. Some bots require custom scripting and setup assistance from NICE CXone.
A software application that handles customer interactions in place of a live human agent. bots into CXone. Some bots require custom scripting and setup assistance from NICE CXone.
The tasks in this topic apply to all supported virtual agent bots. Each bot has its own set of requirements and configuration settings. Read the topic for the bot you're using before completing the integration:
Scripting Guidelines
Before integrating a virtual agent![]() A software application that handles customer interactions in place of a live human agent., you need to know:
A software application that handles customer interactions in place of a live human agent., you need to know:
- Which script you want to add a virtual agent to.
-
The Studio actions
 Performs a process within a Studio script, such as collecting customer data, playing a message or music, or routing a contact to an agent. you need to use for your bot.
 - VoiceBot Exchange and TextBot Exchange—Use these actions for complex bots or for when you need to customize the bot's behavior from turn to turn. Your script must include at least two instances of the action.
- Voicebot Conversation and Textbot Conversation—Use these actions for very simple bots. They don't allow for customization of the bot's behavior from turn to turn.
- Where the Studio actions must be placed in your script flow.
- The configuration requirements specific to the virtual agent you're using.
- How to complete the script after adding the virtual agent action. You may need to:
- Add initialization snippets as needed to the script using Snippet actions. You can do this to customize your bot.
- Re-configure the action connectors to ensure proper contact flow and correct any potential errors.
- Use the OnReturnControlToScript branch to handle hanging up or ending the interaction. If you use the Default branch, your script may not work as intended.
- Complete any additional scripting and test the script.
Ensure that all parameters in the Virtual Agent Hub actions you add to your script are configured to pass the correct data. See the online help topic for the action you're using for information about how to configure each parameter.
If you need assistance with scripting in Studio, contact your CXone Account Representative, see the Scripting Reference Material sections of the online help, or visit the NICE CXone Community site.
Add a Bot to the Virtual Agent Hub
Adding a bot![]() Virtual agent designed to handle specific interactions to Virtual Agent Hub establishes a connection between CXone and the virtual agent provider. After your bot is set up in Virtual Agent Hub, you can assign it to actions
Virtual agent designed to handle specific interactions to Virtual Agent Hub establishes a connection between CXone and the virtual agent provider. After your bot is set up in Virtual Agent Hub, you can assign it to actions![]() Performs a process within a Studio script, such as collecting customer data, playing a message or music, or routing a contact to an agent. in Studio. You only need to add a bot to the Virtual Agent Hub once, but you can use it in more than one script.
Performs a process within a Studio script, such as collecting customer data, playing a message or music, or routing a contact to an agent. in Studio. You only need to add a bot to the Virtual Agent Hub once, but you can use it in more than one script.
-
In Studio, open the script you want to add a bot to or create a new script. If you create a new script, make sure it's of the correct type (chat or voice) for the action you need to use.
-
Click the Tools tab, expand the Automation and AI category, and add a virtual agent action to the correct location in your script.
-
Double-click the action you just added to open the Virtual Agent Hub.
-
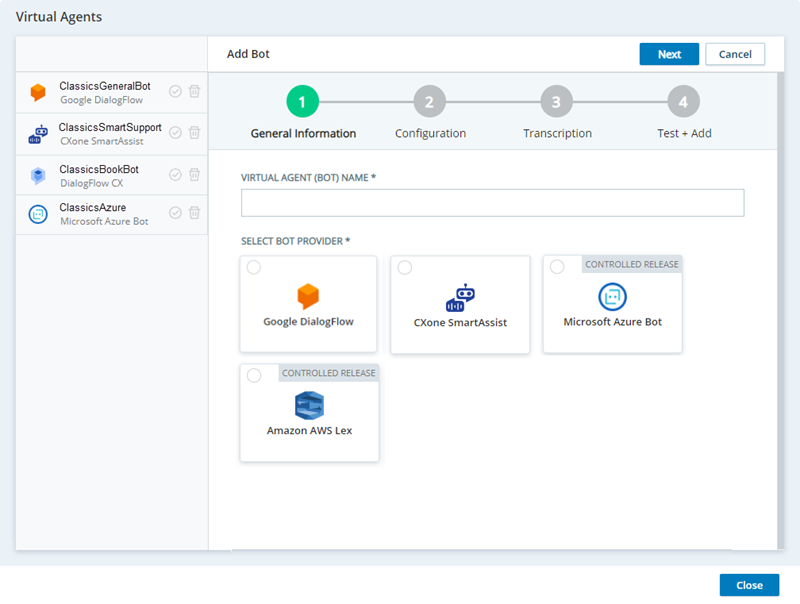
Click Add Bot.
-
Enter a Virtual Agent (Bot) Name and click a bot provider to select it.
-
Click Next.
-
Complete the fields in the configuration form and click Next. These fields are different for every bot. See the topic for the bot you're adding for details:
-
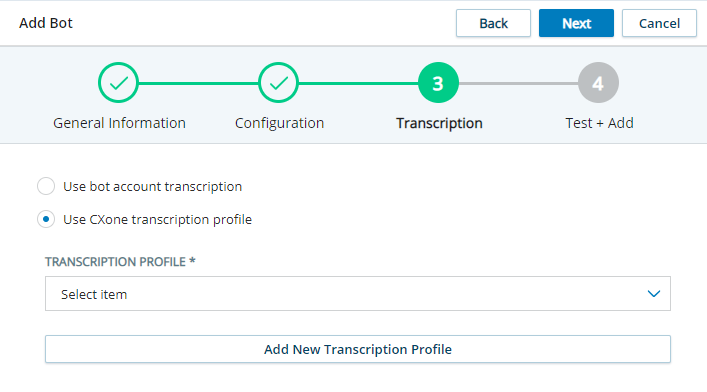
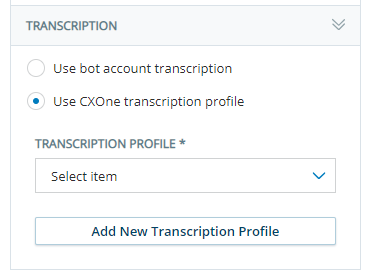
If your bot wizard has a Transcription page, select the option for transcribing speech into text for this bot.
Learn more about fields in this step
Field Details Use bot account transcription Select if you want to use the transcription service that your bot provider offers. The script passes the voice message to the bot provider. The bot provider transcribes it, then analyzes it and sends the response back to the script. Use CXone transcription profile
Select if you want to use a transcription service other than the one your bot provider offers.
Transcription Profile Select the transcription profile you want to use from the drop-down list. The transcription profile defines the transcription service provider and language that the service uses. Add Transcription Profile. Click to add a transcription profile to CXone. A panel slides out so you can add the service without leaving the page you're on. -
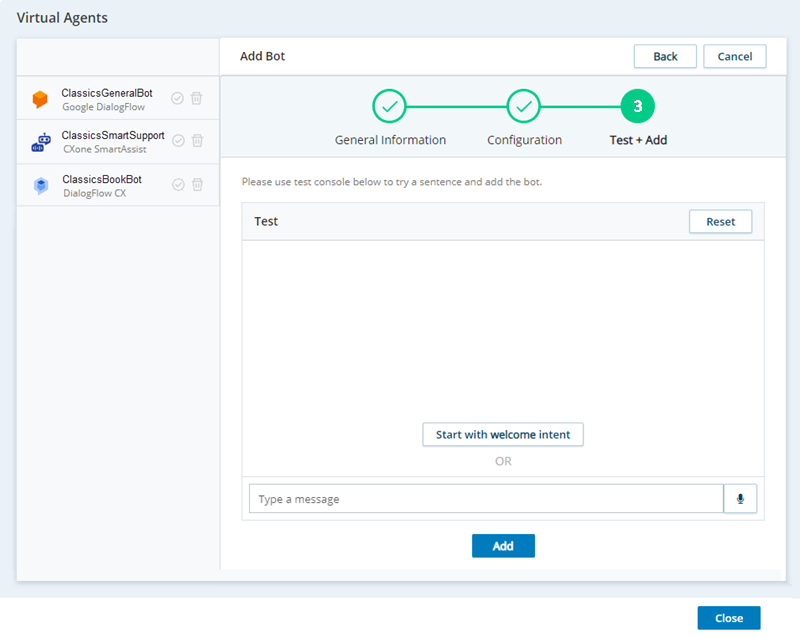
On the Test + Add page, you can test your bot's connection by sending prompts via text. You can also click Start with welcome intent to view the bot's welcome message. If the test messages don't work, click Back to return to the Configuration page and verify the settings.
-
Click Add.
-
If you want to assign this bot to the action you added in this task, click the selection icon
 next to the bot in the left panel of the Virtual Agent Hub. If your script contains other virtual agent actions, assign the necessary bots to each action.
 -
Click Close.
Assign a Bot to an Action
When your bot![]() Virtual agent designed to handle specific interactions is set up and configured in Virtual Agent Hub, you need to assign it to actions in your script. This connects the action to the bot you want it to use. The actions you place in your script depend on the virtual agent you are using and how you intend to use it.
Virtual agent designed to handle specific interactions is set up and configured in Virtual Agent Hub, you need to assign it to actions in your script. This connects the action to the bot you want it to use. The actions you place in your script depend on the virtual agent you are using and how you intend to use it.
- In Studio, open the script you want to modify.
-
If you haven't done so already, click the Tools tab, expand the Automation and AI category, and add the virtual agent action you want to use to the correct location in your script. The action must support the bot you want to assign to it. See the topics for the bot you're using for more information:
-
Double-click the action to open Virtual Agent Hub.
- In the left column, locate the virtual agent bot that you want to assign to the action and click the selection icon next to it.
- Click Close.

Add a New CXone Transcription Profile
A transcription profile allows you to use a different transcription service from the one the bot provider offers.
- In Studio, open the script you want to modify.
- Locate and double-click the supported action that is assigned the bot you want to modify.
- In the list of bots in the left pane of the Virtual Agent Hub, click the bot you want to modify.
- In the center pane of the bot's properties page, scroll to locate the Transcription section
- Click Use CXone Transcription Profile.
-
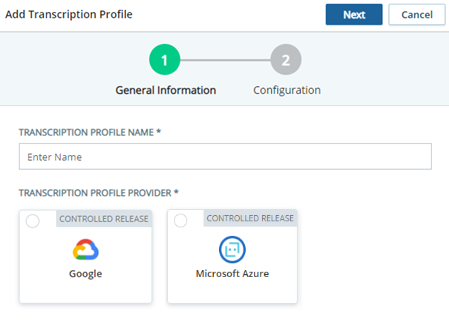
Click Add New Transcription Profile.
- Enter a Transcription Profile Name. To differentiate this profile from your other profiles, use a name that highlights what makes this profile different. For example, you could name the profile for its intended use, the provider, or the language of the profile
- Click the Transcription Profile Provider that you want to use.
- Click Next.
- Select the Language for this profile.
- Click Add.
Change a Bot's Transcription Profile
A transcription profile allows you to use a different transcription service from the one the bot provider offers.
- In Studio, open the script you want to modify.
- Locate and double-click the action that is assigned the bot you want to modify.
- In the list of bots in the left pane of the Virtual Agent Hub, click the bot you want to modify.
- In the center pane of the bot's properties page, scroll to locate the Transcription section.
-
Click Use CXone transcription profile.
- Select the Transcription Profile you want this bot to use. If the option you want to use isn't there, you can add it.
- Click Save.
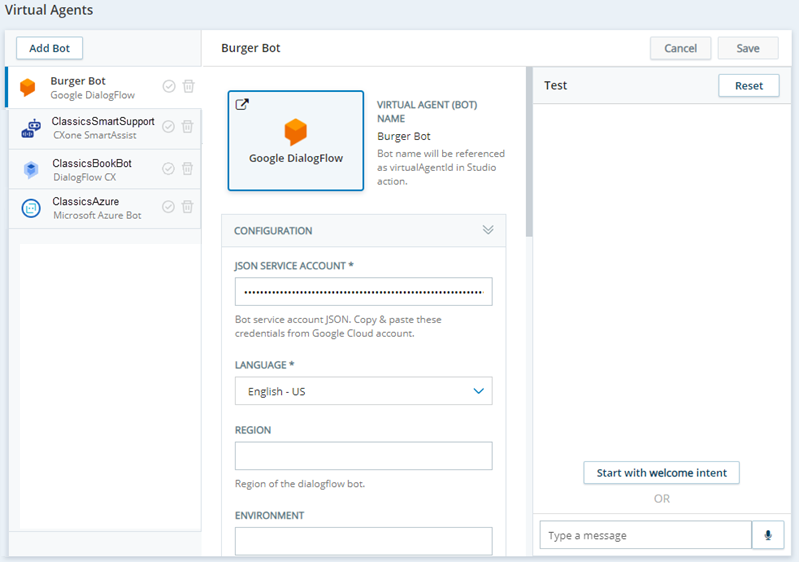
Test Your Bot
You can test your bot![]() Virtual agent designed to handle specific interactions when you set it up in Virtual Agent Hub. If you need to test a bot after you add it to Virtual Agent Hub, you can do so in the bot's properties page in Virtual Agent Hub.
Virtual agent designed to handle specific interactions when you set it up in Virtual Agent Hub. If you need to test a bot after you add it to Virtual Agent Hub, you can do so in the bot's properties page in Virtual Agent Hub.
- In Studio, open a script containing a virtual agent action.
- Double-click any virtual agent action to open the Virtual Agent Hub.
-
Click to select the bot you want to test.
- In the Test pane, enter a test message in the Type a message field.
- Click Start with welcome intent to start a test conversation from the beginning. The bot displays the welcome message and then you can enter test messages.
- When you are finished testing, click Close.