Content on this page is for a product or feature in controlled release (CR). If you are not part of the CR group and would like more information, contact your CXone Account Representative.
The tasks in this topic apply to all supported agent assist![]() A software application that provides context-specific help to the agent. applications. Each application has its own set of requirements and configuration settings. Read the topic for the one you're using before completing the integration
A software application that provides context-specific help to the agent. applications. Each application has its own set of requirements and configuration settings. Read the topic for the one you're using before completing the integration
- Real-Time Interaction Guidance—Provides guidance to agents during voice interactions. Guidance is based on the agent's performance, such as the things they say or don't say.
- Google Contact Center AI—Provides information to the agent that's relevant to the contact's concerns, such as FAQs and knowledge base articles. For CXone chat and voice interactions.
Some agent assist apps may require custom scripting or setup assistance from NICE CXone. Contact your CXone Account Representative for more information.
Integration Prerequisites
Before integrating an agent assist ![]() A software application that provides context-specific help to the agent.application, you need to know:
A software application that provides context-specific help to the agent.application, you need to know:
- Which script you want to add the application to.
- Where the Agent Assist Studio action
 Performs a process within a Studio script, such as collecting customer data, playing a message or music, or routing a contact to an agent. must be placed in your script flow.
 - The configuration requirements specific to the application you're using.
- How to complete the script after adding the Agent Assist action. You may need to:
If you need assistance with scripting in Studio, contact your CXone Account Representative, see the Scripting Reference Material sections of the online help, or visit the NICE CXone Community site.
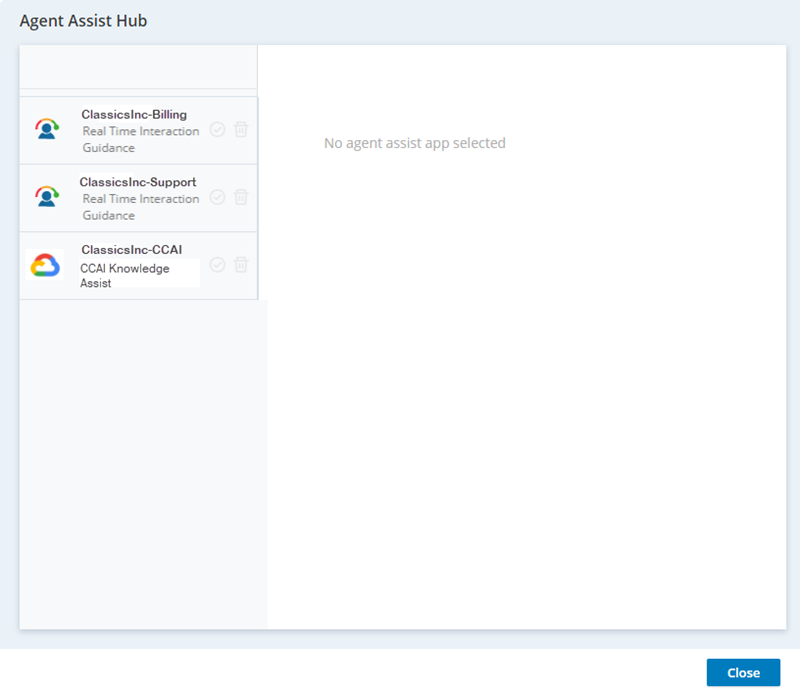
Add an App to the Agent Assist Hub
Adding an app to Agent Assist Hub establishes a connection between CXone and the agent assist provider. After your agent assist app is set up in Agent Assist Hub, you can assign it to actions![]() Performs a process within a Studio script, such as collecting customer data, playing a message or music, or routing a contact to an agent. in Studio scripts. In most cases, you only need to add an agent assist application to the Agent Assist Hub once, but you can use it in more than one script.
Performs a process within a Studio script, such as collecting customer data, playing a message or music, or routing a contact to an agent. in Studio scripts. In most cases, you only need to add an agent assist application to the Agent Assist Hub once, but you can use it in more than one script.
-
In Studio, open the script you want to add an app to or create a new script. If you create a new script, make sure it's of the correct type (chat or voice).
-
Click the Tools tab and locate the Agent Assist action in the Automation & AI category. Add it to the correct location in your script.
-
Double-click the action you just added to open the Agent Assist Hub.
-
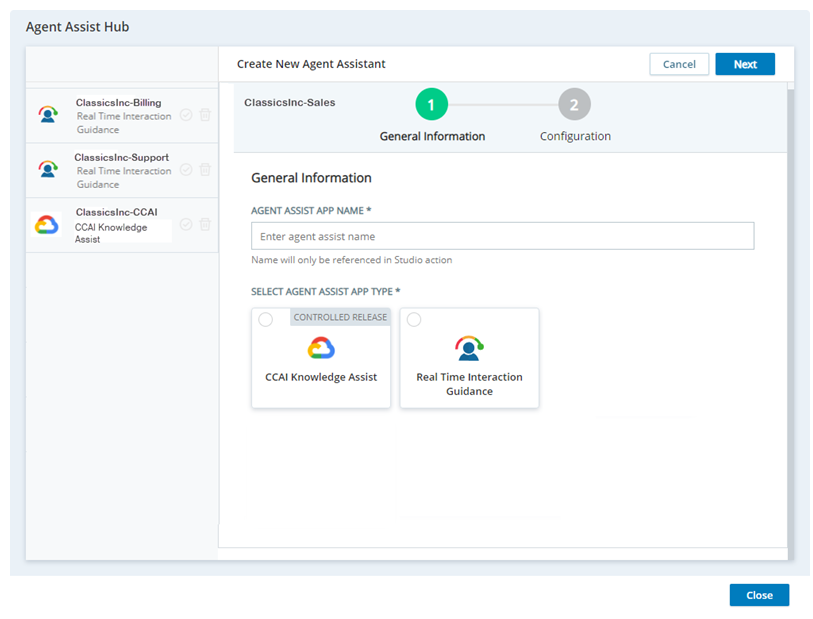
Click Add Agent Assist App.
-
Enter an Agent Assist App Name and click the type of agent assist app you're adding.
-
Click Next.
-
Complete the fields in the configuration form and click Next. These fields are different for every application.
- Real-Time Interaction Guidance—Provides guidance to agents during voice interactions. Guidance is based on the agent's performance, such as the things they say or don't say.
- Google Contact Center AI—Provides information to the agent that's relevant to the contact's concerns, such as FAQs and knowledge base articles. For CXone chat and voice interactions.
-
Click Create.
-
If you want to assign this agent assist application to the action you added in this task, click the selection icon
 next to the application name in the left panel of the Agent Assist Hub.
 -
Click Close.
Assign an Agent Assist App to an Action
When your agent assist![]() A software application that provides context-specific help to the agent. app is set up and configured in Agent Assist Hub, you need to assign it to an action
A software application that provides context-specific help to the agent. app is set up and configured in Agent Assist Hub, you need to assign it to an action![]() Performs a process within a Studio script, such as collecting customer data, playing a message or music, or routing a contact to an agent. in your Studio script. This connects the action to the application you want it to use.
Performs a process within a Studio script, such as collecting customer data, playing a message or music, or routing a contact to an agent. in your Studio script. This connects the action to the application you want it to use.
- In Studio, open the script you want to modify.
-
If you haven't done so already, add the Agent Assist action to the correct location in your script.
-
Double-click the Agent Assist action to open Agent Assist Hub.
- In the left column, locate the agent assist application that you want to assign to the action and click the selection icon next to it.
- Click Close.