

As a user of Performance Management, this topic tells you what actions you can take. These tasks include managing gamification features like coins or using widgets like tasks.
Create and Join Challenges
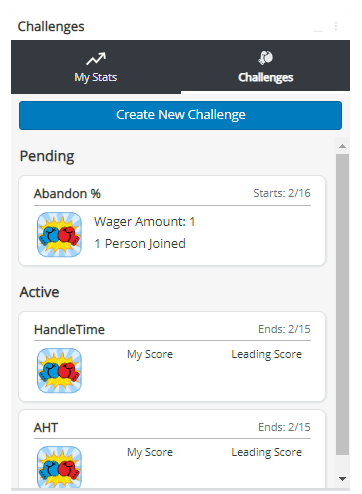
Challenges allow you to earn coins through workplace competitions that you can use to purchase items in the Marketplace. Any user can create challenges. The Challenges module provides a central method for you to create and join challenges, plus view details on pending and existing challenges. A supervisor or administrator can set the guidelines for which users can create challenges. Your challenge appears in the Challenges tab of this module under the Pending list until it begins. This section explains how to create and join challenges.
Create a Challenge
- Navigate to your dashboard with a Challenges module.
- Click the Challenges tab at the top of the module.
- Click Create New Challenge.
- Configure the Challenge Setup window by determining the metrics by which you want to challenge, the duration and date, and how many coins you want to wager.
- Click Next.
- Invite the users you want to participate in the challenge by clicking the checkbox next to their names. You can search for specific users in the search bar at the top.
- Click Invite.
Join a Challenge
You can join challenges by clicking Accept in one of the following two locations:
- The Challenges tab of your Challenges dashboard module
- The notification item in your Notification Center
Join Games
Games are created by an administrator and pay out rewards from the system. Different from challenges because you do not need to wager coins to play. An administrator can set up multiple types of games, some games are designed for you to compete against yourself and pay out rewards based on your performance, and other games are designed to compete against other agents. Your Games dashboard module is your access point for anything game-related. You can view invitations to play games, view game details, and join games directly from this module. If you want to join a game, you can:
- Click the blue Join Game button to view more information on what the game is, what the prizes will be, and so forth. Click Play Game to actually join the game.
-
If you have missed any rewards by not participating in games, you will receive a weekly notification of these games. If they are still ongoing and you want to join, you can click Join from that pop-up.

View Your Rules
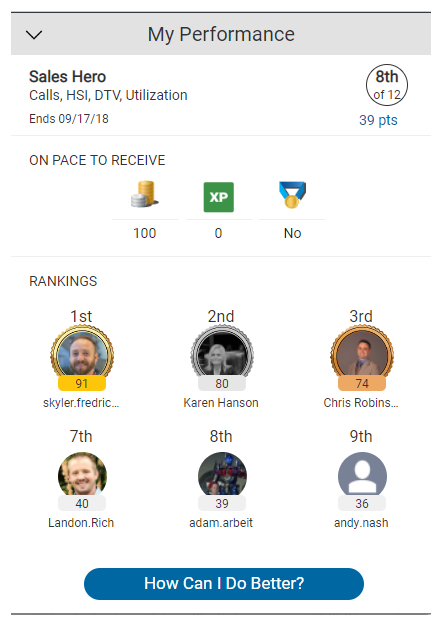
Rules are competitions within your contact center that reward coins, badges, and experience points. The rewards can be used for features like customizing your avatar or in the Marketplace. From the side menu, click Widgets > Rules to view rules you are participating in. Click on a rule to view your performance for that rule. The My Performance window shows your anticipated award for the rule, the current rankings. Click on How Can I Do Better? to show detailed information on your performance for the rule.
Manage Your Profile
You can access your profile in the upper-right corner of Performance Management by clicking your profile picture and selecting Profile & Avatar in the drop-down. This drop-down gives access to the following abilities:
- View gamification statistics (such as earned coins and gems).
- View and customize your avatar and personal bio. You can also view your teammates' avatars and personal bios.
- Change the language of your interface.
- Enable multi-factor (MFA) authentication, which adds an extra layer of security on your account. If you enable MFA, you must also create an additional MFA password and download an authenticator app. With this app, you will scan a QR code each time you log in. Accepted authenticator apps are Microsoft Authenticator, Google Authenticator, Authy, or LastPass. Your administrator may require you to set up MFA, or you can choose to enable it for yourself.
View Your Coin History
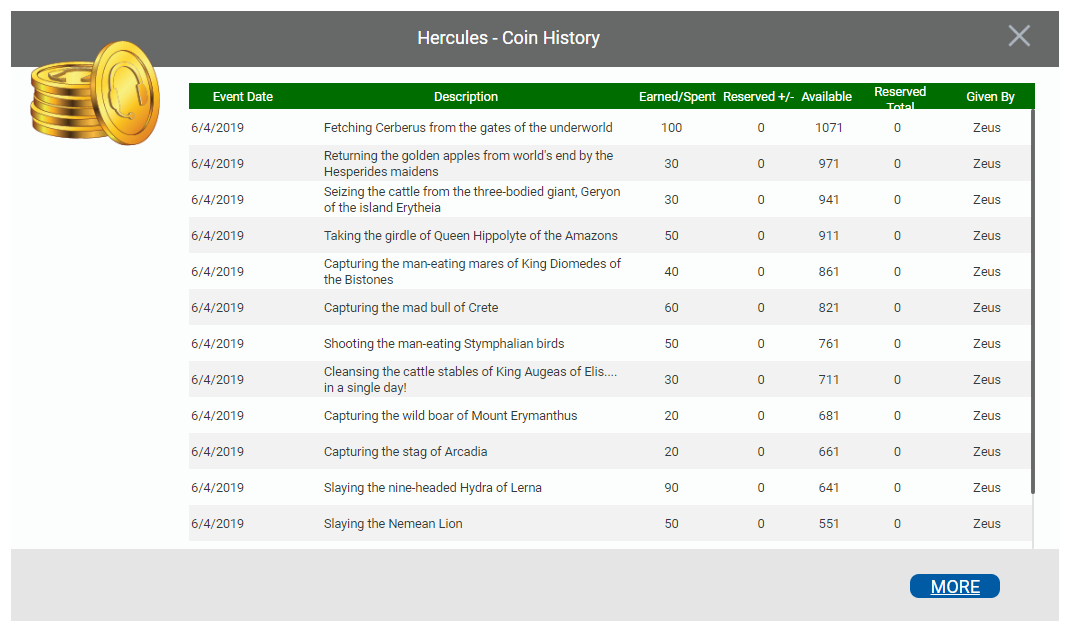
Your coin history allows you to see your coin balance, the sources of coins you have earned, and the items on which you have spent coins.
- Click your profile icon in the upper right corner and select Profile & Avatar.
- Click the coin counter above your avatar to open the coin history window.
 Learn more about fields in this step
Field
Details
Event Date Displays the date and time of the coin transaction. The coin history is sorted in descending order by event date. If you have more events than can be displayed on one screen, you can click More to see them. Description
Provides a recap of the event in which you either earned or spent coins.
Earned/Spent Displays the total number of coins earned or spent in the event. Reserved +/- Displays the number of reserved coins added or subtracted as a result of the event. Reserved coins are coins you have earned based on a rule, but that have not yet been paid out. A subtraction event means the coins have been paid and are now part of your available balance. Available Displays your total coin balance as a result of the event. Reserved Total Displays your total reserved coin balance as a result of the event.
Purchase Products in the Marketplace
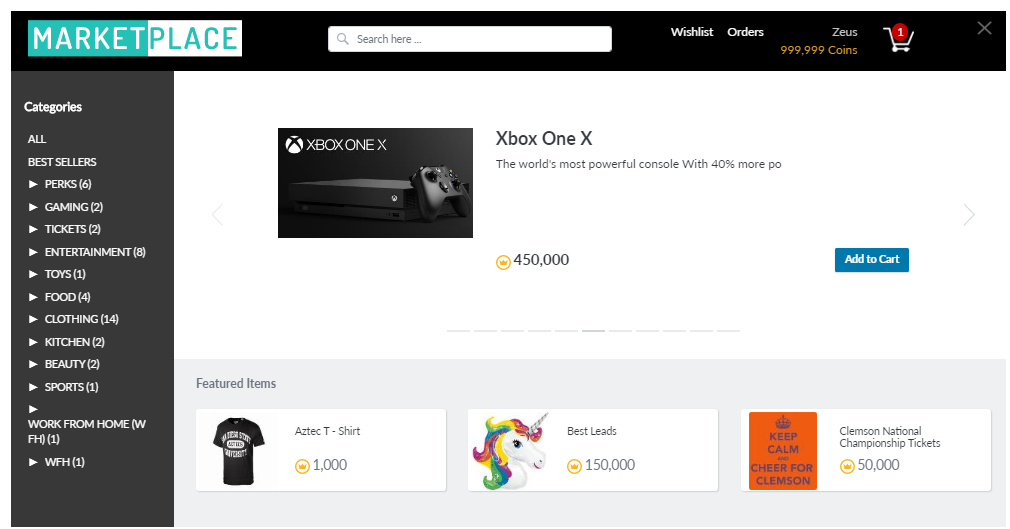
The CXone Performance Management Marketplace provides prizes and products to spend your hard-earned rewards from participating in games and challenges. The process of purchasing a product is similar to any standard process of online shopping. If you have questions about receiving your purchased items, ask your supervisor.
- Check the amount of coins you have in your profile.
- Click the shopping cart icon in the top-right corner of the interface.
- Browse through the available products. Notice whether a product is on sale, if it has quantity limitations, and the price.
- Click Add to Cart to add the product to your shopping cart. You can put multiple items in your shopping cart and purchase everything at the same time.
- Click the shopping cart icon in the top-right corner of the Marketplace to view all items you have added to purchase. If you have items in your cart, a red icon with a number displays in the cart.
- Review the items in your cart and make any edits to the quantities or items.
- Click Checkout to complete the purchase process.
View and Create Tasks
Coaches, supervisors, and others with appropriate permissions can create tasks and assign them to agents as needed. Agents can create their own task list to manage their priorities. The task list displays Tasks, the Due Date for each task, and who each task was Assigned By (or Assigned To for tasks sent to others). You can sort the list by any of these values. The default sort is in ascending order by due date.
A task with a coach's whistle indicates the task was assigned during a coaching session. Tasks turn red if they are incomplete and the due date has passed.
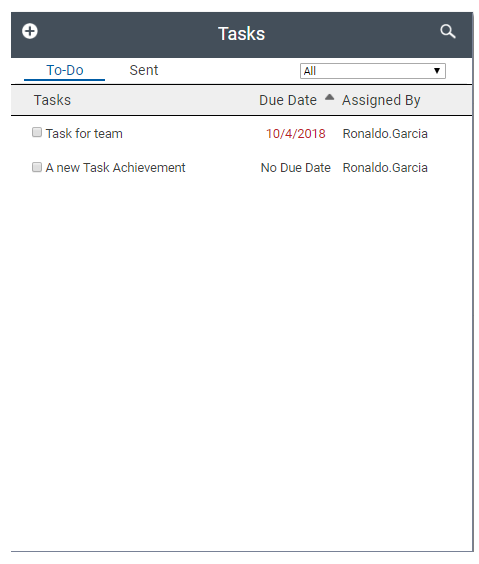
- Click Widgets>Tasks to display the tasks pane, which opens on a tab with your To-Do list. If you do not see the task you want, you can search for it by clicking the magnifying glass in the upper right corner of the pane. You can also filter the list to display all tasks, incomplete tasks, or tasks completed within the last 30 days.
-
View image
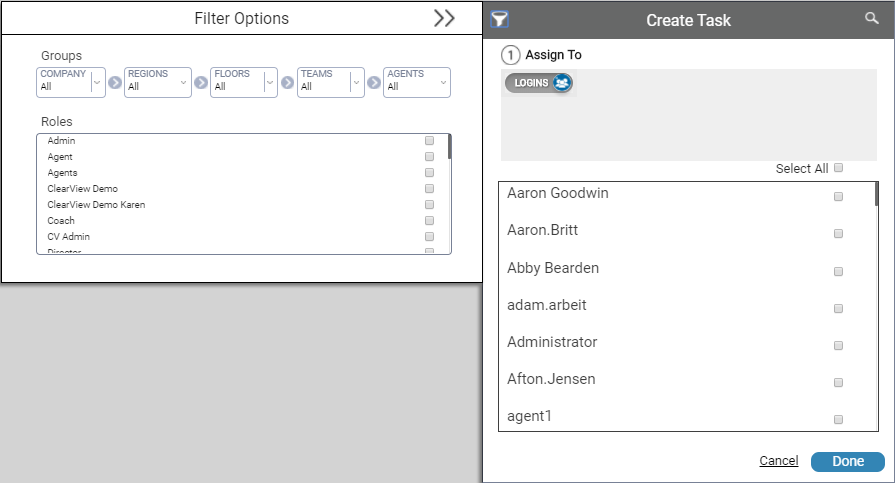
- Click the Add icon (indicated by a plus sign in a white circle) in the upper left corner of the tasks pane.
- Select the users the task should be Assigned To. The default value is Self. To assign the task to another, click Self to change the value to Logins and then select one or more other users from the displayed list. You can filter the list by clicking the filter icon in the upper right corner of the pane. You can only assign tasks to others if you have permission to do so. When you are finished, click Done.
- Type the task in Set Task Name. This field is required.
- Set Task Date/Time by clicking in the sub-fields Start Date, Due Date, and Time Due. Use the calendar and clock selectors to complete these fields. If Start Date is set to a future date, the task will not appear in the task list until that date.
- Select the Allow Assignee to Signoff Task checkbox if you want the user to be able to mark the task complete.
- Click Create or, if you change your mind, click Cancel to return to the list of tasks.
- Select the checkbox for a task to mark it complete.
- You can see a list of tasks you have assigned to others if you click the Sent tab.
- Click anywhere outside of the tasks pane to close it.
Take and Submit Surveys
You can view and take surveys in the widgets drop-down of the side-menu. You can view surveys that are assigned to you, as well as those you have completed.
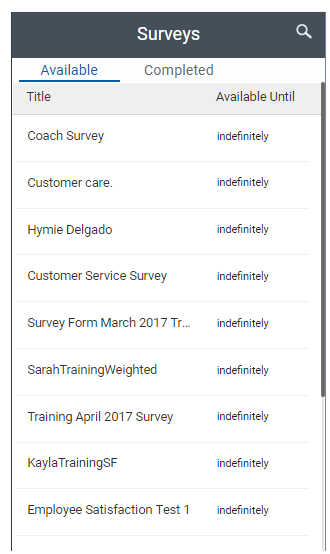
- Click Widgets > Surveys to see the list of surveys. The Available tab lists any surveys assigned to you individually, to groups of which you are a member, or both. The Completed tab shows surveys you have previously submitted.
- On the Available tab, click the name of the survey you want to take.
- Answer the questions on the survey, which opens in a separate window.
- Click Submit.