

You can use security policies to determine the account security of your different groups of users through password strength and account timeout stipulations. You can create different security policies with varying degrees of password strength and strictness. Security policies are applied to users through their role. You can create a security policy on the Security Policies page (User Settings > Security Policies) and apply or change security policies on the roles page (User Settings > Roles). This topic explains how to create a security policy and how to apply the policy to a role.
If your organization uses outsourced personnel (BPO users), you can work with your CXone Account Representative to create a unique BPO security policy.
Create Security Policies
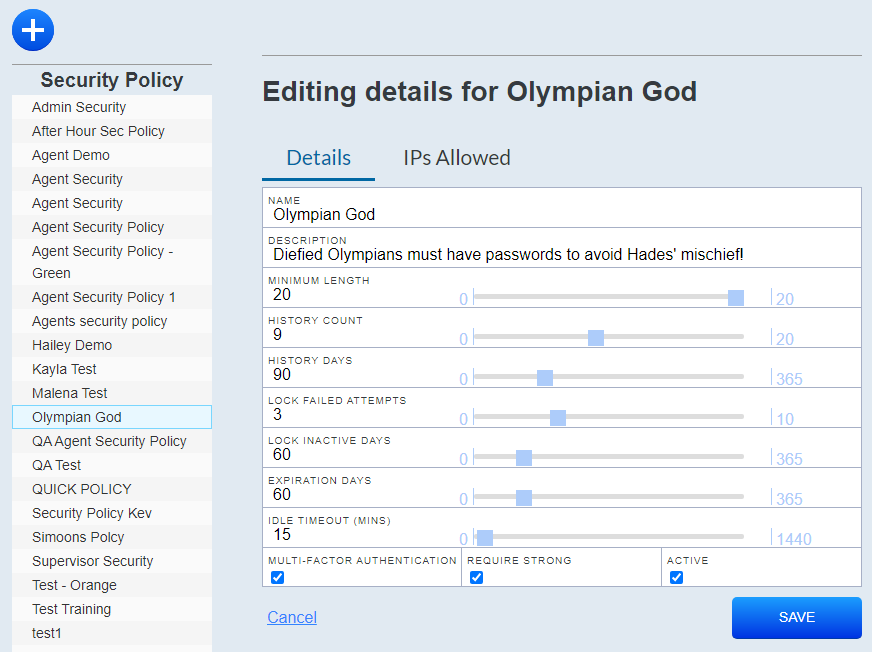
- Click User Settings > Security Policies.
- Click the Add icon (indicated by a blue circle with a plus sign).
- Type a Name.
- Configure your desired password details.
 Learn more about fields in this step
Field
Details
Minimum Length
The minimum number of characters for a password.
History Count
A password cannot be re-used within this value’s amount of password changes.
History Days
A password cannot be re-used within this value’s amount of days.
Lock Failed Attempts
The user account locks after this value’s failed number of attempts.
Lock Inactive Days
The user account will lock after this value’s number of inactive days.
Expiration Days
The password expires after this value’s amount of days.
Idle Timeout (Mins)
Determines the number of minutes before a user’s session will timeout.
Multi-Factor Authentication Enable this setting if you want to require the user to have enhanced security through multi-factor authentication. After enabling this setting, effected users will set up their MFA password. Users must use an authentication app (Microsoft Authenticator, Google Authenticator, Authy, or LastPass) to scan a QR code each time they log in.
After enabling MFA, if a user forgets their MFA password, you can reset their MFA settings in their user account by clicking the Rest Authenticator button.
Require Strong
Select this radio button to require a strong password with 3 of the 4 following requirements:
- Uppercase Letters
- Lowercase Letters
- Numbers (0-9)
- Symbols (! @ # and so forth)
Active
Select this radio button to activate the security policy.
-
Optional: Insert an IP Address range.
- Click the IPs Allowed tab.
- Click the Add IP Range icon (indicated by a blue circle with a plus sign).
- Type the IP address and range.
- Click Save.
Apply Security Policies to Roles
- Click User Settings > Roles.
- Select the role to which you want to apply a security policy by searching for the role or scrolling through the roles list.
- Click the edit icon (indicated by a green circle with a pencil).
- Drop-down the list of security policies in the Security Policy section and select your desired security policy.
- Click Save.