

Roles allow you to control what users can do and see in CXone Performance Management. Through careful role design and assignment, you can ensure that users are able to perform all the tasks they need to perform, without having access to any pages or information they should not see. You have the ability to drill-down and determine each individual element of CXone Performance Management that you want users with this role to access. You can create a completely new role, or, if you want to create a role that's similar to an existing role, you can copy an existing role and make necessary edits. This topic provides details for the Roles page and explains how to create an original role and a new role from a copy.
You must create and configure CXone Performance Management roles before creating users, since you must assign roles to your new users.
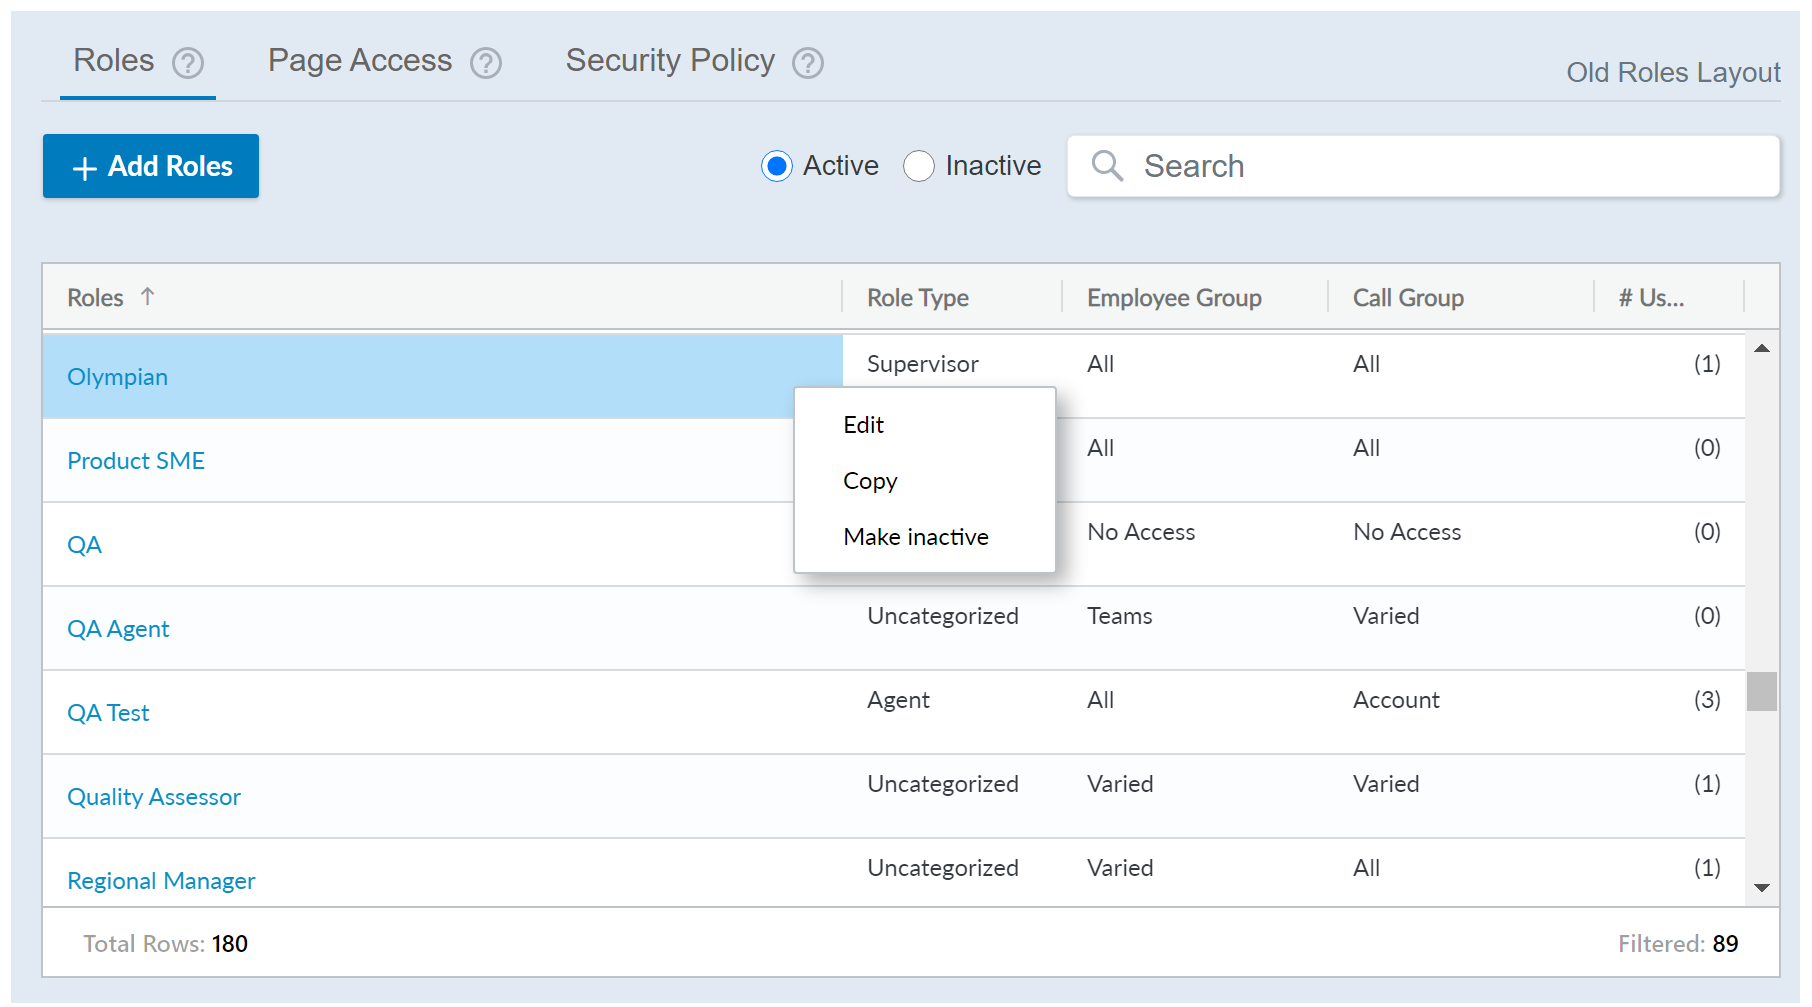
Create Original Roles
- Click User Settings > Roles in the side-menu navigation.
- Click Add Roles.
- Configure the Details tab, which determines the level of security, including data group and group access.
 Learn more about the Details tab:
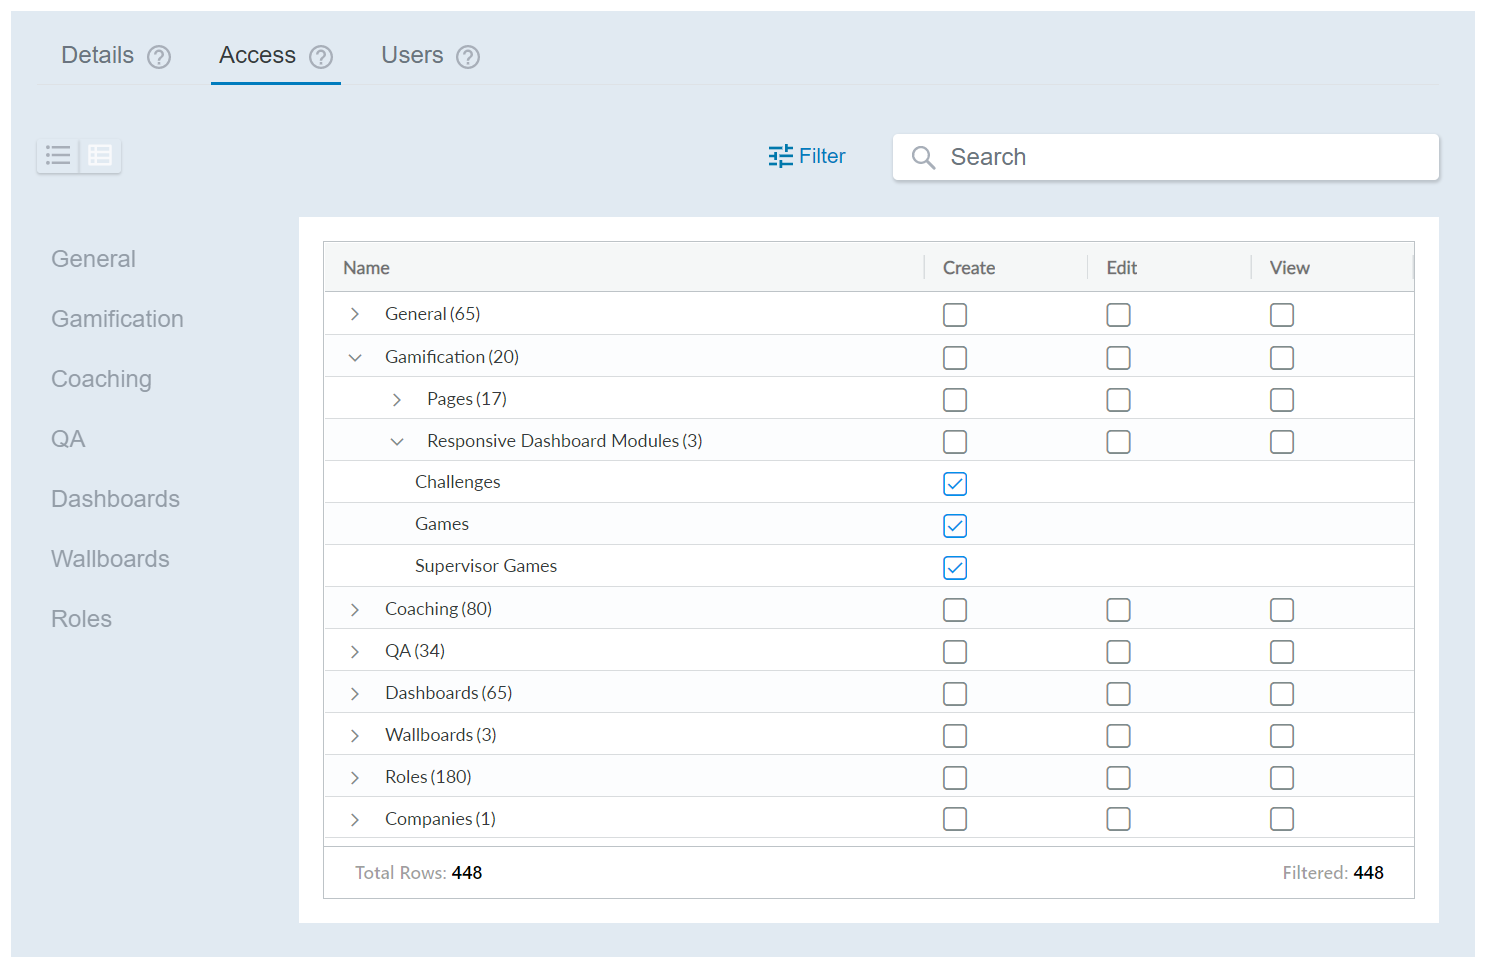
Field Description Role Type Determines the most common permissions and access for the role, which aligns with the 4 personas: Agent, Supervisor, Administrator, and Executive. Personas help categorize roles and users, which streamlines items like messaging and new features. Security Policy Determines the password requirements or inactivity timeout duration for users with this role. When you create a new role, a default security policy will be applied with medium password security. Master Setup Conveniently give this role access to all forms and roles to easily create a master role for administrative purposes. If you select either of these checkboxes, all forms and roles on the Access tab automatically select, too. Likewise, if you deselect any forms or roles on the Access tab, the correlating All Forms or All Roles box in this field automatically deselect, too. Employee Group Access Sets group level access for the data that can be viewed, both within dashboards and while managing account setup pages. You can expand the Advanced Settings section to customize the access by specific subjects, such as statistics, accounts, and so forth. Call Group Access Sets group level access for the data that can be viewed, both within dashboards and while managing account setup pages. You can expand the Advanced Settings section to customize access by specific subjects, such as statistics, accounts, and so forth. - Configure the Access tab, which allows you to determine permissions for all pages, modules, and features of CXone Performance Management to which this role has access. Access is separated into the following main categories: General, Gamification, Coaching, QA, Dashboards, Wallboards, and Roles. Some categories may differ, depending on the add-ons your organization is utilizing, such as Gamification. You can view the content of this tab as a table or a list. Expand the following drop-downs for more information of either view.
Additionally, the Filter allows you to limit which categories display, helping you find specific items. Table view:
Allows you to expand the different categories and select which permissions you want to enable.
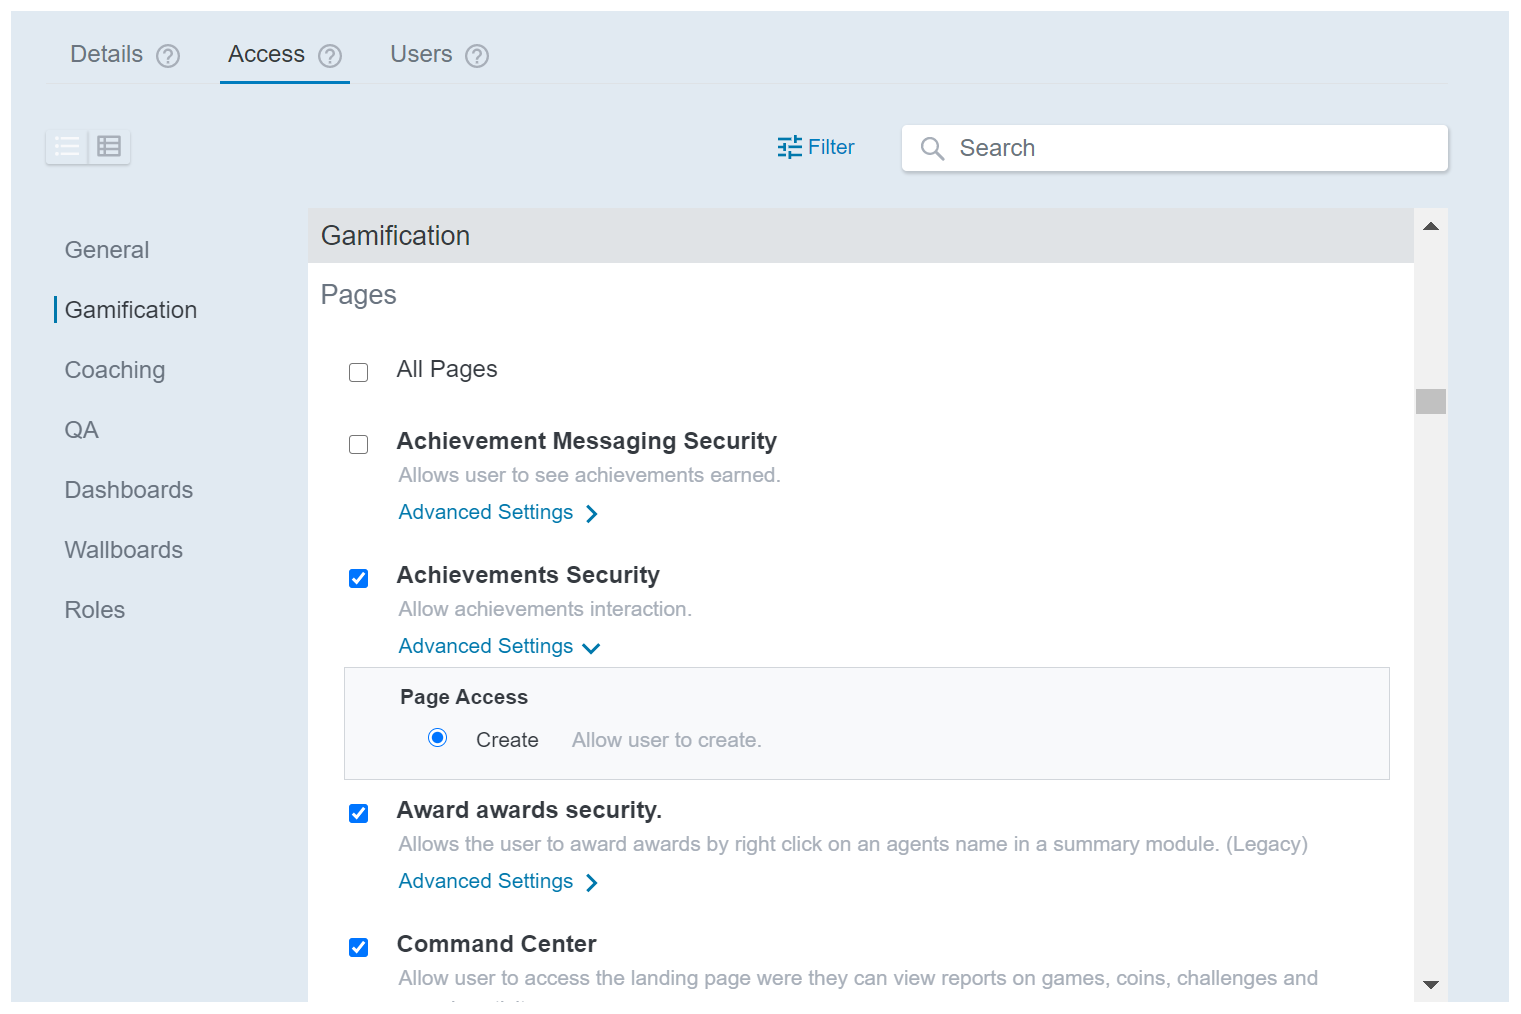
 List view:
Allows you to use the left-side navigation to jump to a specific category. The All Pages radio button automatically selects all pages in this section with full create, edit, and view permissions. You can expand the Advanced Settings section for each page to define which type of permission users with this role will have (create, edit, and view).
- Save your changes as you edit the unique permissions for the role.
- After creating and assigning a role to users, you can view which users are assigned the role by clicking the Users tab.
- Click Back when you are finished customizing the role permissions, which returns you to the Roles page.