

Configure CXone Agent Settings
Use CXone Agent Settings to configure the task and screen pop settings for profiles.
-
Click Navigation (indicated by a rocket) > Customize List.
-
Click Add-Ins > CXone Agent Settings > Add.
-
Click OK. CXone Agent Settings now appears in the Navigation window.
Configure Click-To-Dial
The NICE CXone click-to-dial add-in functionality allows an agent to make an outbound call to a contact directly from the contact workspace in Oracle Service Cloud. For help with troubleshooting the Oracle Service Cloud product, see your Oracle documentation.
-
Click Configuration > Application Appearance and double-click Workspaces/Workflows.
-
Double-click Contact workspace.
-
Click the Office Phone field to reveal a right-facing arrow in the upper right-hand corner of the field, and click Delete.
-
Click Insert Control.
-
Drag and drop the Table into the Contact Workspace. By default, the table will be created with two rows and two columns.
-
Click the second row to reveal a right-facing arrow in the upper right-hand corner of the field, and click Delete to remove the row. Repeat this step for the row in the second column.
-
Click Insert Field.
-
Drag and drop Phone Numbers into the first column of the table.
-
Click Insert Control.
-
Drag and drop Click-To-Dial Button into the second column of the table.
-
To align the fields, drag and drop Spacer between the Office Phone and Click-To-Dial fields.
-
Click the Office Phone field to reveal the Object Tools > Design.
-
Click the Table Cell > Increase Column Span.
-
Click Save.
Once configured, the Click-To-Dial button appears next to the Office Phone for the contact associated with an incident or task.
Configure Screen Pops
You can configure and customize screen pops, or windows of information about the contact with whom the agent is currently connected, by creating a query using NICE CXone IVR![]() Automated phone menu that allows callers to interact through voice commands, key inputs, or both, to obtain information, route an inbound voice call, or both. script variables and specifying certain settings in your CXone Agent Settings and data mapping.
Automated phone menu that allows callers to interact through voice commands, key inputs, or both, to obtain information, route an inbound voice call, or both. script variables and specifying certain settings in your CXone Agent Settings and data mapping.
A screen pop goes through three phases: 1) The NICE CXone IVR/ACD![]() System that recognizes, routes, and connects contacts to available agents based on skill and priority. system receives a call. 2) The system delivers the call to an agent with query control variables. 3)The NICE CXone Agent for Oracle Service Cloud performs a query of contact records using the variables.
System that recognizes, routes, and connects contacts to available agents based on skill and priority. system receives a call. 2) The system delivers the call to an agent with query control variables. 3)The NICE CXone Agent for Oracle Service Cloud performs a query of contact records using the variables.
-
Configure the CXone Agent Settings in NICE CXone Agent for Oracle Service Cloud. Specify:
- Which objects the script will search for the contact's information when an agent receives an inbound call or email.
- The action that occurs when a query returns one record, multiple records, and no records.
-
Create a script that opens an existing object for the contact. The script should search and, if the object exists, deliver the number and the call metadata to the NICE CXone Agent for Oracle Service Cloud. If the object does not exist, the script should send the caller’s phone number (ANI (automatic number identification)
 Also known as caller ID. Listed phone number of an incoming voice call.) to the extension, which searches for and opens the caller's contact record.
 -
Create the controlled variables for the script to send to the NICE CXone Agent for Oracle Service Cloud. To do so, use Studio to set the ScreenPop property to TRUE (see the ASSIGN script action for more information) and use one or both of the following methods to create controlled variable queries:
-
crm# variables for simple queries
For
crm#variables,#is a number from 0-9. These variables identify portions of the query and have the syntaxobject.field=value.If you use multiple
crm#variables, you must combine them into a single query. Group variables that apply to the same object as "AND" queries, or queries where all conditions must be true for a record to be a match.Example 1:
If the IVR
Automated phone menu that allows callers to interact through voice commands, key inputs, or both, to obtain information, route an inbound voice call, or both. script sends the following variables:crm0=Incident.ID=7
The extension runs the following ROQL query:
SELECT incident FROM incident WHERE I WHERE I.ID=7
Which returns an incident object for the incident with ID 7.
Example 2:
If the IVR script sends the following variables:
crm0=Organization.ID=10
The extension runs the following two ROQL queries:
SELECT O.Contacts FROM Organization O WHERE O.ID=10
Which returns all contacts whose OrganizationID is 10.
-
crmcquery# variables for complex queries
If you do not create query variables, Agent for Oracle Service Cloud runs a default query. Agent for Oracle Service Cloud runs the default query for the ANI in the phone number fields of these objects.
Example:
Select emails.emaillist.address from contact where contact.emails.emaillist.address=john@niceincontact.com.
-
- In Studio, set the ScreenPopSource property of the REQAGENT script action to Default from Skill.
- In CXone, enable the Use Screen Pops option for each Used to automate delivery of interactions based on agent skills, abilities, and knowledge you want to run the query. For more information, see Configure Screen Pops.
Configure Task and Data Mapping Settings
The NICE CXone Agent for Oracle Service Cloud application can store meta data and agent notes about a call in custom objects. You can map data from the NICE CXone Agent for Oracle Service Cloud to nearly any object and field in the Oracle Service Cloud, and import custom objects for mapping. Oracle Service Cloud stores the NICE CXone data to the most recently opened instance of an object type.
You should provide agents with an after call work period to enter notes and explicitly identify the contact, case, or opportunity with which to link the call record.
-
Double-click CXone Agent Settings.
-
Click the profile you want to configure. Use_default applies to any profile without custom settings.
-
Click the Custom radio button to configure new data mappings for the selected profile.
-
Specify whether Oracle should create an activity history, known as a task, and whether Oracle should open, or "pop," the task after creating it.
-
Map NICE CXone data values to Oracle Service Cloud objects. To do so:
-
Choose an entity (object) from the drop-down list, and click Add Entity.
-
Click Add Field.
-
Select the type of value to assign to the field and the types of data that should be associated with the value.
-
-
Configure screen pops for your mapped data. Determine what data, if any, should be displayed for contacts with:
-
No matching records
-
A single matching record
-
Multiple matching records
-
- Click Save.
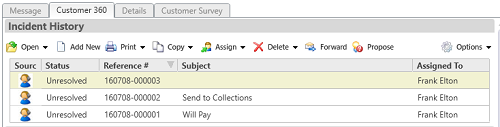
A confirmation message appears upon successful configuration of the new field mappings. The example below illustrates the configuration of an incident subject that contains the NICE CXone Agent disposition![]() Result that the agent or system assigns to the contact when the interaction ends. value.
Result that the agent or system assigns to the contact when the interaction ends. value.