

Complete each of these tasks in the order given.
Before you set up inbound voice ![]() Used to automate delivery of interactions based on agent skills, abilities, and knowledge, first contact your NICE CXone account representative to help you set up a DNIS for each inbound voice
Used to automate delivery of interactions based on agent skills, abilities, and knowledge, first contact your NICE CXone account representative to help you set up a DNIS for each inbound voice
Create a Campaign
If you've already created a campaign![]() A grouping of skills used to run reports. that you plan to use for inbound voice, you can skip this step. For example, you may have a campaign that you intend to use across several channels.
A grouping of skills used to run reports. that you plan to use for inbound voice, you can skip this step. For example, you may have a campaign that you intend to use across several channels.
- Click the app selector
 and select ACD.
 - Go to Contact Settings > Campaigns.
- Click Create New.
- Enter a value in the Campaign Name field.
- Click Create Campaign.
Create an Inbound Voice ACD Skill
-
Click the app selector
and select ACD. -
Go to Contact Settings > ACD Skills.
-
Click Create New > Single Skill.
- Set the Media Type to Phone Call and Inbound/Outbound to Inbound.
- Enter a Skill Name and select the Campaign you want the
-
Configure the remaining optional fields in the Skill Information section as needed.
 Learn more about fields in this step
Field
Details
Transferred to Script The script that runs when an agent transfers a contact to this The hours of operation profile that controls when agents can transfer a contact to this
Workforce Intelligence Minimum Agents The minimum number of agents that must belong to this Workforce Intelligence Minimum Available Agents The minimum number of available agents that must be maintained for this - If you want to use screen pops A configurable pop-up window with information about the contact. It appears on an agent's screen after a certain event, usually when the agent connects to a contact. for this
-
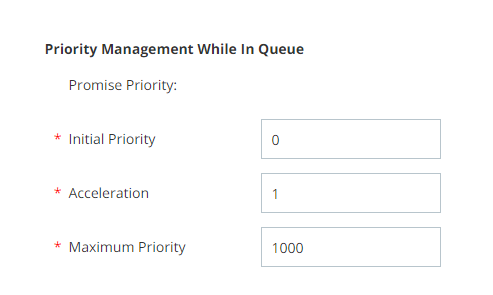
If you want to customize the prioritization settings for this
Learn more about fields in this step
Field
Details
Initial Priority The base level priority Skill-based designation of the importance of contacts that determines delivery order. for all contacts for this Acceleration
How quickly the priority of this
Maximum Priority The maximum priority that a contact on this -
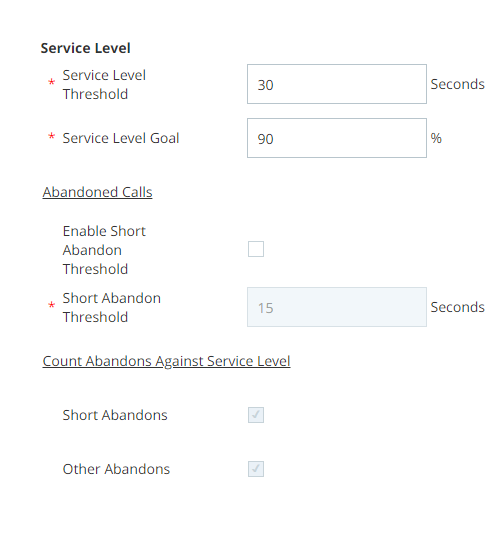
If you want to change the service level settings for this
Learn more about fields in this step
Field
Details
Service Level Threshold The number of seconds agents have to respond to meet an SLA Commitment between a service provider and a customer with a defined service level threshold, including quality, availability, and responsibilities.. For example, if your SLA for this skill is to respond to 80% of contacts within 20 seconds, enter a value of 20.Service Level Goal
The percentage of contacts agents must respond to by the Service Level Threshold to meet the SLA. For example, if the SLA for this
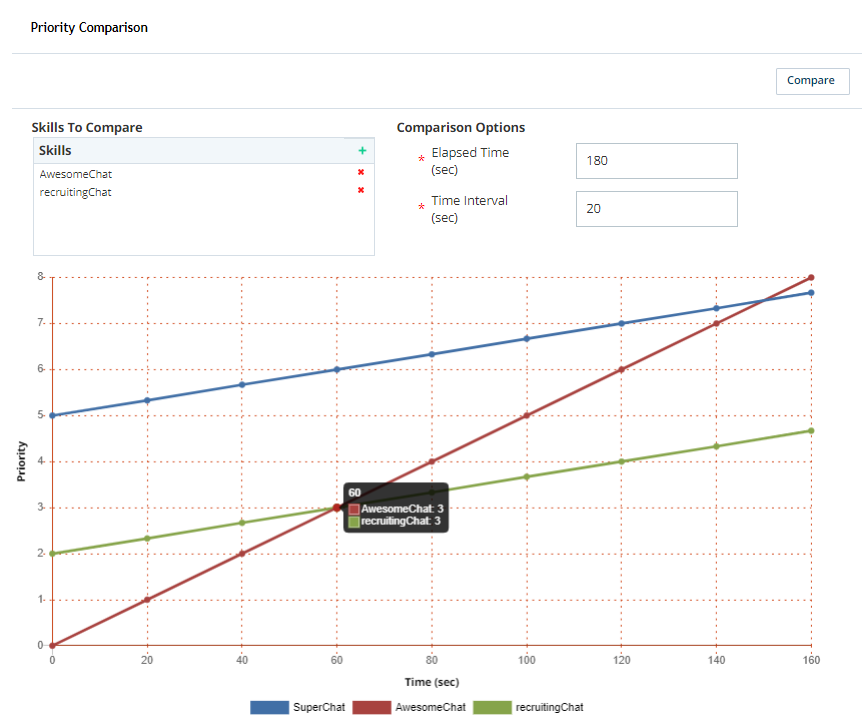
Enable Short Abandon Threshold CXone collects data and offers reporting on abandoned Call that enters the contact center system, but the caller ends the call before reaching an agent. contacts that fall within the Short Abandon Threshold for this Short Abandon Threshold The number of seconds that must pass for an abandoned interaction to be considered a short abandon. For example, if the value is set to 15 and an interaction drops from the queue after 7 seconds without being delivered to an agent, it is reported as a short abandon. Short Abandons Counts short abandons, as defined by the Short Abandon Threshold, against the service level for reporting purposes. Other Abandons Counts abandons that exceed the Short Abandon Threshold against the service level for reporting purposes. - If you want to test how contacts in this
- Select the
- Enter how much time you want to see in the comparison chart in the Elapsed Time (sec) field.
- Enter how much time you want to be represented by the markers on the X axis of the chart in the Time Interval (sec) field.
- Click Compare.
- Select the
- Click Create.

Assign Users to the ACD Skill
-
Open the
-
Click the Users tab.
- Select the users you want to add.
- Click Add Users.
Create an Inbound Phone Script
- In Studio, click File > New.
- In the Create New Script window, select the Phone icon. Verify that the Business Unit is correct and click OK.
-
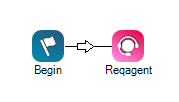
Add BEGIN and REQAGENT actions to the canvas and connect them. Inbound calls automatically route to the this
Used to automate delivery of interactions based on agent skills, abilities, and knowledge specified in the point of contact associated with this script. If you want to route the call to a different voice - If you want to set up an IVR Automated phone menu that allows callers to interact through voice commands, key inputs, or both, to obtain information, route an inbound voice call, or both., add it here. You may need to contact your NICE CXone account representative for guidance.
- If you configured screen pops for the
-
If you want to, you can customize the script with additional actions that you want to occur during call events, such as when the call begins, is transferred to another agent, or ends.
- Click File > Save.
- In the Save Script As... window, enter a name for the script, and click Save.
Create a Point of Contact
-
Click the app selector
and select ACD. -
Go to Contact Settings > Point of Contact.
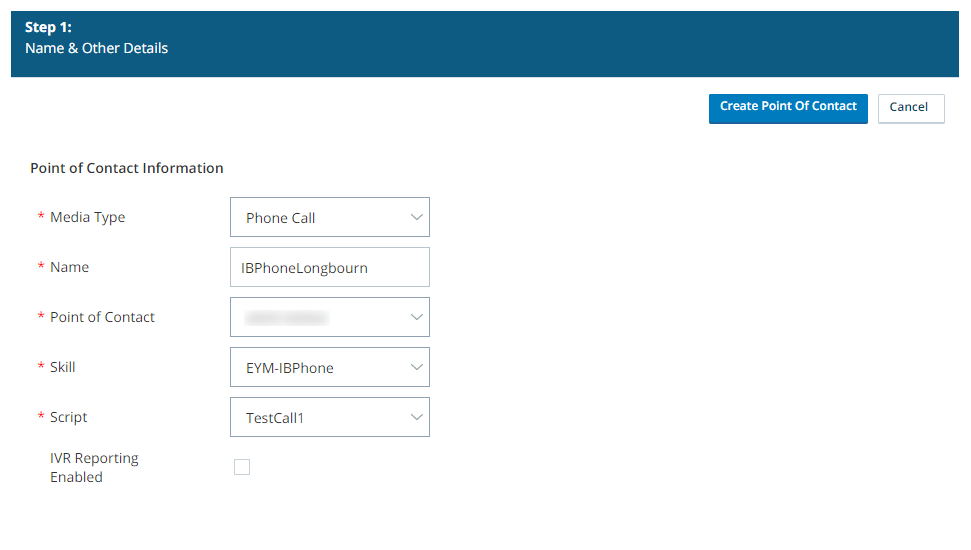
- Click Create New and select Single Point of Contact.
- For the Media Type field, select Phone Call.
- Enter a Name for the point of contact.
- From the Point of Contact drop-down, select the DNIS you configured earlier with NICE CXone that you want to reach this
- Select the
- Select the Script you created in Studio.
- If you want calls to this number to track IVR press paths for reporting, select IVR Reporting Enabled.
- Click Create Point of Contact.
Create a Do Not Call (DNC) Group
You can skip this step if you already have a do not call (DNC) group you want the
-
Click the app selector
and select ACD. -
Go to Lists > DNC.
-
Click Create New.
-
Give the group a DNC Group Name and, if you want, a Description.
-
Click Save.
Assign the ACD Skill to Do Not Call Groups
You can skip this step if you want the
-
Click the app selector
and select ACD. -
Go to Contact Settings > ACD Skills.
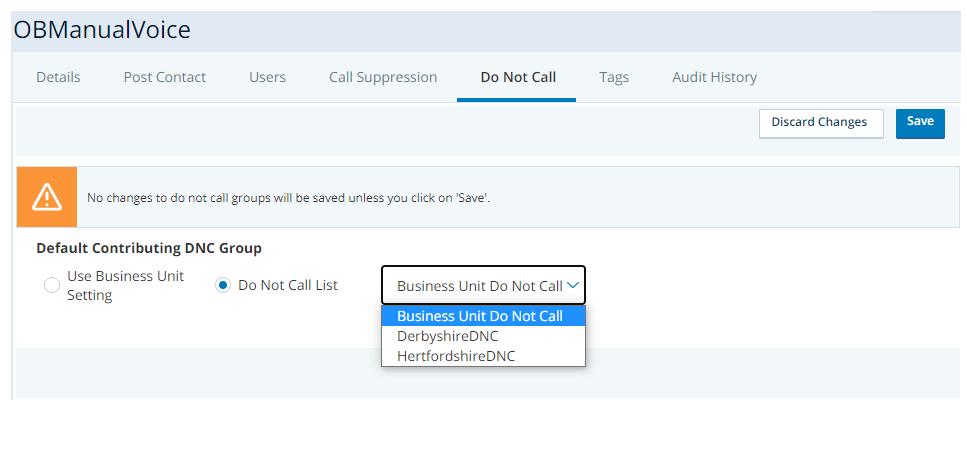
- Click the
- Click the Do Not Call tab.
- For Default Contributing DNC Group, select Select Do Not Call Group. From the drop-down, select the DNC group you want this
- Click Save.