

Setting up verified SMS requires that you create at least one brand. A brand defines the information that customers see in verified SMS messages. This includes the organization's name, logo, and a tag line or description. After creating your brands, you need to enable SMS registrations to send verified SMS messages. Each SMS registration supports one brand. You can use one brand listing across multiple SMS registrations.
When you create a brand, you also need to specify a contact person in your organization. Google contacts this person to verify your organization and the brand. The email Google sends contains instructions about how to complete the verification process. If you create more than one brand, Google requests verification for each one.
Create a Brand and Localization
You need at least one brand to configure verified SMS. You can create multiple brands if your organization needs them.
-
Click the app selector
 and select ACD.
 -
Go to Contact Settings > SMS Branding.
-
Click Create New and enter a Name for the brand.
-
Click Create.
-
At the bottom of the Brand Details page, click View Localizations for Brand.
-
Click Create New.
 Learn more about fields in this step
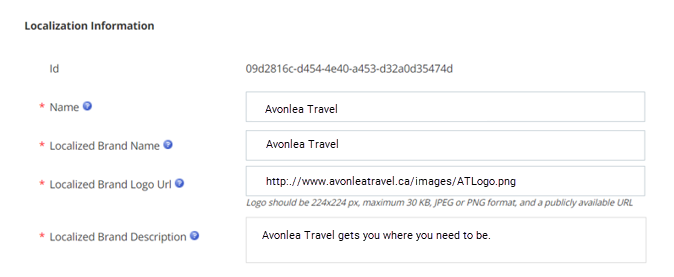
Field Details ID Displays the identification number CXone automatically generated for this localization. Name
Enter the internal name for this localization. Customers don't see this information.
Localized Brand Name Enter the localized name for the brand. This is what appears as your organization name in text messages. Customers see this information. This field has a maximum of 40 characters. Localized Brand Logo URL Enter the URL to your company logo for this localization. The file must be publicly hosted, JPG or PNG format, 224 x 224 px, and a maximum of 50 KB. Localized Brand Description Enter the localized description for this brand. This appears beneath the logo on the conversation start card when the customer views an SMS message from your organization. -
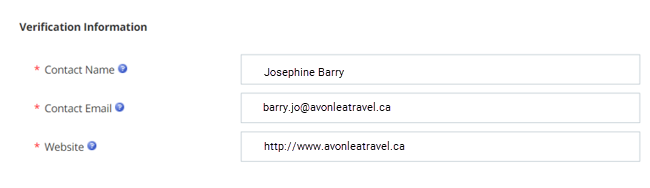
Under Verification Information, provide the details about the person in your organization that Google can contact to verify information about this brand. Google sends an email to the specified email address with instructions on how to verify the brand.
-
Click Create in the top right corner of the page.
Verified SMS and SMS Registrations
For each SMS registration's transport code, you need to know the brand and the localization you want to use with that code. Each transport code can support one brand. You can use one brand across multiple transport codes.