

Actions are the central piece of Studio because they provide the foundation for developing a script. A unique icon appears for each action, so you can easily see it in your script. For example, the Menu action appears as follows:

Studio provides hundreds of different actions, and each action performs a process of some kind. Examples include: collecting data, playing a message or music, checking to see if a phone number is in the do not call (DNC) list, providing menu options to the caller, and so on. Studio actions reside in both the Framework tab and the Tools tab:
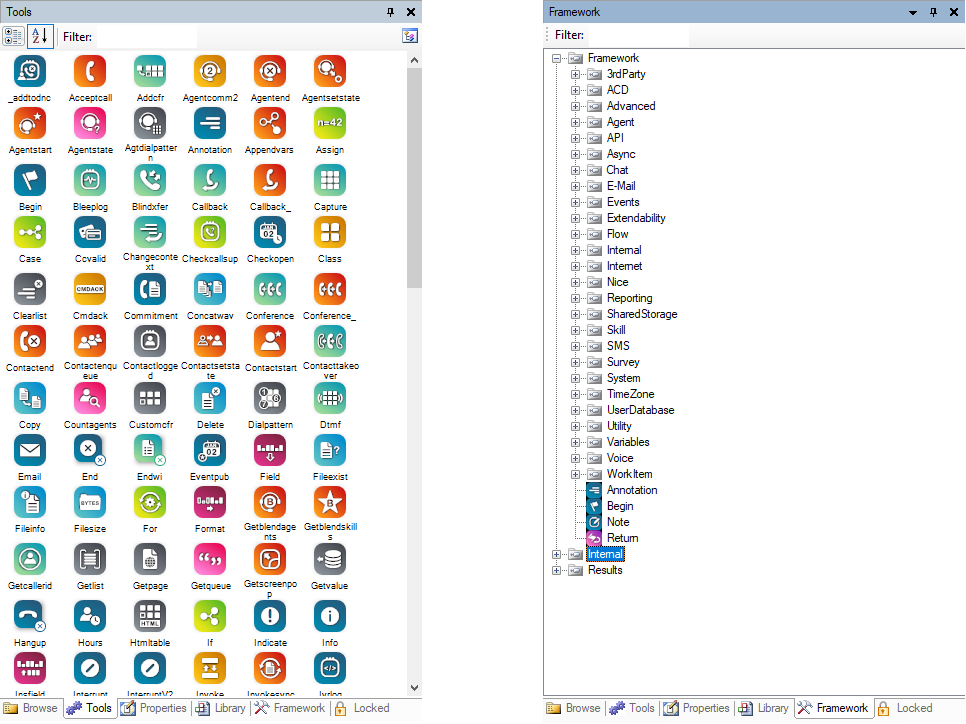
To transition an action from the Tools tab to the canvas, click the action one time only and then drag it to the canvas. To transition an action from the Framework tab to the canvas, you must click-and-hold the action and then drag it to the canvas.
The Framework tab contains many more actions, as it is the complete list of all available actions. The Tools tab contains most common actions used for scripting. You can view these actions alphabetically, or grouped together in palettes. You can create your own palette of actions to compliment your style of scripting, or you can use the default palettes.
While most actions appear in Studio as a default, certain actions will appear only if you enable a feature in your implementation. For example, your ASR actions will appear in the Framework tab only if you have ASR enabled in your implementation. For more information, contact your account manager.
Though the Tools tab contains the most commonly used actions by default, the actions that each scripting expert might use most often varies by script type and level of expertise. As such, you can create custom palettes to which you can add your favorite actions.
The actions that appear in the Tools tab depend specifically on the type of script in which you are working. For example, if you have a phone script open in your canvas then click the Tools tab to look for the Askcaller action, you won't find it. The reason it does not appear is because Askcaller is engineered to work in chat script types only. Because you have a phone script type open, only actions that work with phone scripts will appear in the Tools tab.
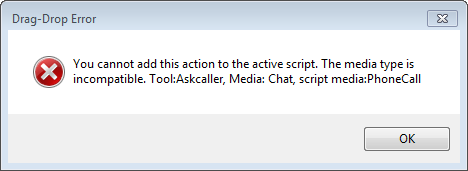
In the Framework tab, regardless of the script type you have open, you can still see all actions. However, if you attempt to drag-and-drop an action to a script type that is incompatible with that action, you will receive a drag-drop error. This error notifies you that the action is incompatible with the script type.
One aspect that makes Studio so powerful is the ability to intricately configure each individual action. Every action serves a specific purpose, but the scripter typically must further configure the action properties to perform the intended function.
When updating the Asgard Hotline ASR![]() Allows contacts to respond to recorded voice prompts by speaking, pressing keys on their phone, or a combination of both. scripts to be compatible with the Nuance 10.5 engine, Heimdallr must configure each ASR action's confidence levels. These levels improve the accuracy of speech recognition, which in turn contributes to the efficacy of a script's routing performance when interacting with voice contacts. Heimdallr right-clicks each ASR action to open the Properties box, then configures the Minimum and High confidence properties.
Allows contacts to respond to recorded voice prompts by speaking, pressing keys on their phone, or a combination of both. scripts to be compatible with the Nuance 10.5 engine, Heimdallr must configure each ASR action's confidence levels. These levels improve the accuracy of speech recognition, which in turn contributes to the efficacy of a script's routing performance when interacting with voice contacts. Heimdallr right-clicks each ASR action to open the Properties box, then configures the Minimum and High confidence properties.
Depending on the action, you might have multiple methods of configuring actions:
- Properties—Display an action's properties by right-clicking on an action to open the Properties box, or left-clicking to highlight and open the Properties tab. The action's properties include branch options and offer customization parameters such as identifying a specific skill or entering text to appear as a message to an agent.
- Additional Configurations—Some actions have additional configuration options that you can access/launch by double-clicking the action. For example, double-clicking the Play action opens the Play Properties box, allowing you to record an audio prompt.
- Branches—When connecting one action to another, the PickBranch box opens for you to select (or create) the type of branch that a contact will take under certain circumstances. For example, selecting the Error branch will direct a contact along that branch when an action fails to execute properly.