

This topic explains how to create a trusted application in Skype for Business Server, the first step in the installation and configuration process.
In the following steps, names within angle brackets (<>) represent placeholders for your unique values. These parameter values appear in the images by way of example and you may use them in your configuration as appropriate:
- TrustedApplicationPoolFqdn (connector machine full computer name) — IncontactConnector.incontact.int
- TrustedApplicationId — IncontactConnector
- PortNo — 6067
- Open a Windows PowerShell command prompt in elevated mode, or "Run as Administrator."
- Run the following command and note the Registrar service name for use in a later step:
Get-CsService -Registrar
- Run the following command and note the Site name for use in a later step:
Get-CsSite
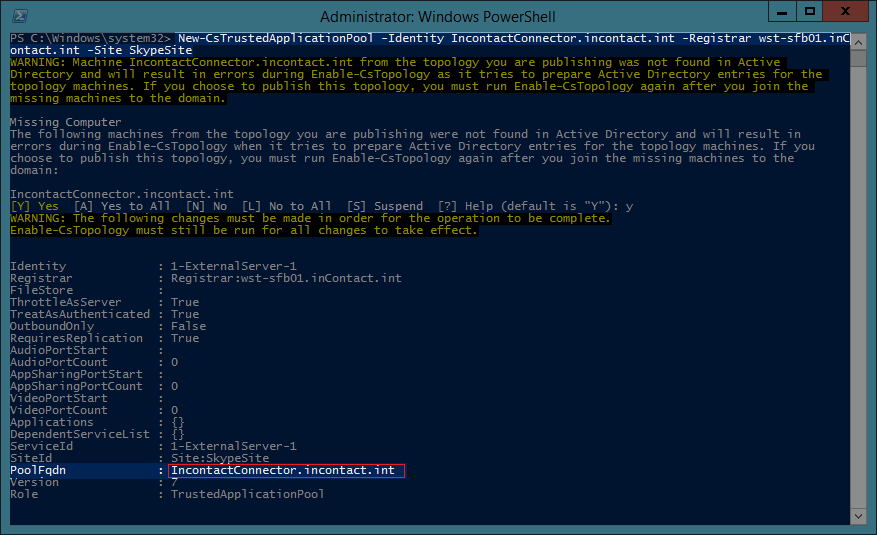
- Run the following command using the values as explained:
New-CsTrustedApplicationPool -Identity <Identity> -Registrar <Registrar> -Site <Site>
- Identity — Full computer name of the machine where Skype for Business Connector will be installed
- Registrar — Registrar service name of skype for business server
- Site — Site name of the Skype for Business server
- Skype for Business Connector typically uses port 6067. To see whether the chosen port is already in use, run the following command on the machine where Skype for Business Connector will be installed:
netstat -an | find <PortNo]>

If the port is already in use, you must select an alternate port.
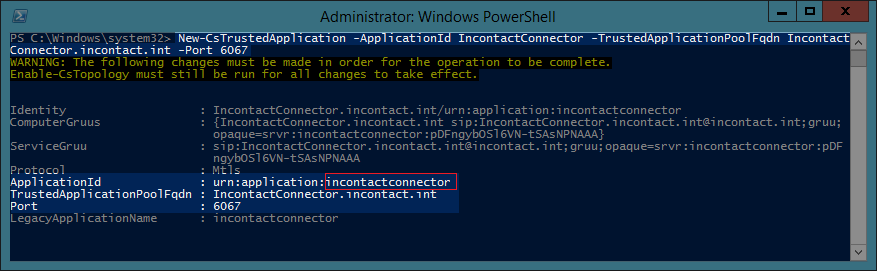
- Run the following command using the values as explained:
New-CsTrustedApplication -ApplicationId <ApplicationId> -TrustedApplicationPoolFqdn <TrustedApplicationPoolFqdn> -Port <PortNo>>
- ApplicationID — Unique Id of the trusted application you are creating
- TrustedApplicationPoolFqdn — Full computer name of the machine where Skype for Business Connector will be installed
- PortNo — Open port on the machine where Skype for Business Connector will be installed
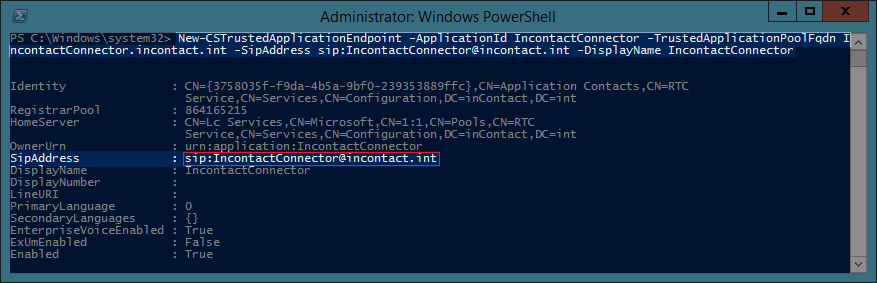
- Run the following command to create a trusted application endpoint using the values as explained:
New-CSTrustedApplicationEndpoint -ApplicationId <ApplicationId> -TrustedApplicationPoolFqdn <TrustedApplicationPoolFqdn> -SipAddress <SipAddress> -DisplayName <DisplayName>
- ApplicationID — Id of the trusted application created using the previous command
- TrustedApplicationPoolFqdn — Full computer name of the machine where Skype for Business Connector will be installed
- SipAddress — Contact URI of the trusted application, formatted as sip:trustedapplicationid@domain. You will also use this value later for the Application Contact URI when you configure Skype for Business Connector.
- DisplayName — Display name of the trusted application endpoint
- Run the following command using the values as explained:
Get-CsTrustedApplication -Identity <Identity>
- Identity — Fully qualified domain name (FQDN) of the server on which Skype for Business Connector will be installed, followed by a slash (/), followed by the application ID. Formatted as TrustedApplicationPoolFqdn>/<ApplicationId
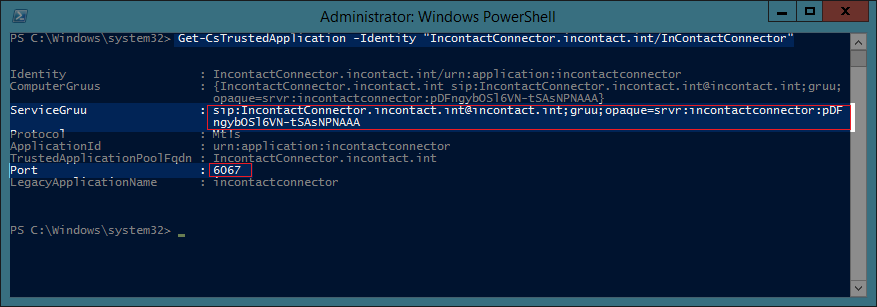
Note the ServiceGruu and Port information, as it will be used in the Application Gruu and Application Port fields, respectively, when you configure Skype for Business Connector.