

Requirements
Your Zendesk system must meet the following requirements to integrate with the agent application:
- Your system must have sufficient Zendesk Talk Partner Edition licenses - 1 license for each user with access to the integrated agent.
- A dedicated administrator service account (API user), which you can identify on the Company Settings page in the CXone Console, explained in the following section.
- API password and token access enabled in the Zendesk platform.
- Accessibility via TCP port 443 (https) to the NICE CXone Cloud.
Connect Zendesk to your CXone Environment
This task is performed on the Company Settings page in the CXone Console.
- Navigate to the Company Settings page of the CXone Console.
- Click the CRM tab.
- Select Zendesk in the first drop-down.
- Enter the Hostname for your Zendesk instance.
- Enter the Username and Password for the designated administrator service user account.
- Click Save.
- Click the Phone System tab, which is within the Company Settings page.
- If NICE inContact is not already selected in the first drop-down, select it.
- Select
- Enter the Access Key ID that your implementation representative provided you.
- Enter the Access Secret that your implementation representative provided you.
- Enter the appropriate URL for your Authentication Host. Contact your CXone Account Representative for more information. You must enter one of the following URLs based on your region:
- na1.nice-incontact.com
- eu1.niceincontact.com
- au1.nice-incontact.com
uk1.niceincontact.com
ca1.niceincontact.com
- Click Save.
Install the Application
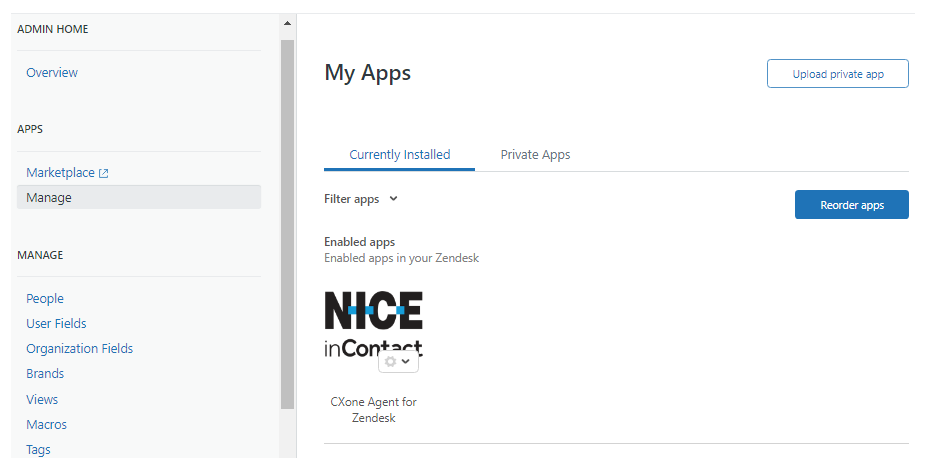
Zendesk provides a Marketplace from which you can install the agent application. After installing the application, the app will appear under the Currently Installed category of the My Apps page in Zendesk.
- In the Zendesk platform, open the Admin menu by clicking the cog in the sidebar.
- Click Marketplace under the APPS category to open the Zendesk Marketplace.
- Search for NICE CXone in the search bar.
- Click Agent for Zendesk to open the application's details page.
- Click Install.
Configure Application Settings
- Navigate to the My Apps page in Zendesk (Admin cog in the sidebar > Manage). You will see CXone Agent for Zendesk under the Currently Installed category.
- Click the settings down-chevron on the app icon to expand the settings options and select Change Settings.
- Enter a Title for the agent application, which appears in the header of the application window.
- Enter the Application URL, which is https://app-crm.niceincontact.com/zendesk.html. The NICE CXone implementation team will provide you with this URL.
- You can enter the Zendesk password to use Zendesk's Talk API suite.
- You can determine which user roles have access to the app by selecting the Enable role restrictions? radio button and selecting from the drop-down which roles you want to have access.
- You can determine which groups have access to the app by selecting the Enable group restrictions? radio button and selecting from the drop-down which roles you want to have access.
- Click Update.
Any social media, social networking, and other technology sites, applications, or products referenced in this topic are the property of their respective owners.