

Create a Team
-
Click the app selector
 and select Admin.
 -
Click Teams.
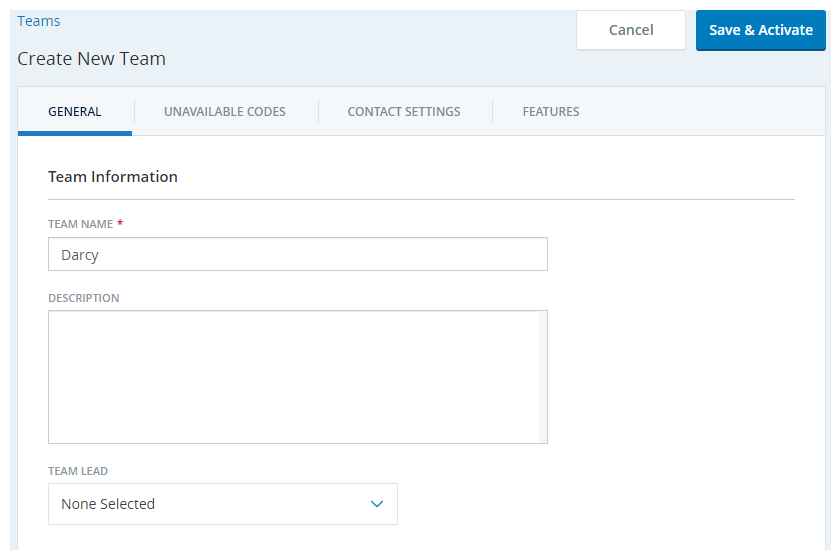
- Click New Team.
- Enter a Team Name and optionally a Description.
-
If you want a record of who the team lead is, select the name of the Team Lead from the drop-down. Any active user can be the team lead. A single user can be the team lead for multiple teams.
- If you want to add unavailable codes to the team, click Unavailable Codes. Click Add Unavailable Codes and select each unavailable code you want agents on this team to see in their agent application. When you're finished selecting codes, click Confirm.
- Click Features.
-
Select the checkboxes for each feature or product you want to enable for the team. You'll be billed for each agent in the team for the feature, whether the agent actually uses the feature or not.
- Click Save and Activate.
- Configure the team contact settings as needed.
Edit Teams
You can edit teams if you have permission to do so. You may also need additional
- To add or remove unavailable codes, you must have permission to view Teams and to edit Unavailable Codes.
- To add or remove users, you must have permission to view Teams and edit
- To duplicate a team, you must have permission to create Teams.
- To deactivate or reactivate a Team, you must have specific permission to do so.
Configure Contact Settings
On this tab, you'll configure how you want agents in this team to handle contacts. The content on the tab varies depending on whether your tenant is enabled for single channel handling or Omnichannel Session Handling. If you have granular options enabled, you may be able to configure either type of contact handling for the team.
Configure Single Channel Handling
-
Click the app selector
and select Admin. -
Click Teams.
- Click the team you want to configure to open it.
- Click the Contact Settings tab.
-
Select values from the Concurrent Chats and Auto-Parked Emails drop-downs to specify the default number of each that agents on the team can handle.
 Learn more about auto-parking emails
Auto-parking puts new emails in an agent's inbox automatically. This setting lets you specify how many emails can be auto-parked per team member for the entire team. The maximum is 25. You can also select Off to disable this feature for the team.
- You can customize these values for specific agents. For example, you might not want to auto-park emails to new agents. To set custom limits:
- Find an agent in the list.
- Enter a new value in the field for each agent.
- Click Save.
Configure Omnichannel Session Handling
|
Field |
Details |
|---|---|
| Delivery Mode |
Available only when your CXone Account Representative enables granular Omnichannel Session Handling (OSH) settings. It specifies whether you want agents on the team to use Omnichannel or Single Contact handling. The Omnichannel Delivery Mode allows agents to handle multiple contacts using various channels at the same time. Agents can also elevate contacts to other channels. The Single Contact Delivery Mode allows agents to handle only one contact using one channel at a time. Those agents also have the ability to elevate contacts to other channels. |
|
Voice |
The maximum number of voice channel interactions an agent on the team can handle at one time. This includes hard and soft voice calls of all types—inbound, manual outbound, and Personal Connection dialer—and voicemails. The maximum allowed voice contacts is 1 (including phone and voicemail). Select Off to disable voice. |
| Chats, Emails, Work Items, SMS
|
Defines how many concurrent interactions of each type an agent on the team can handle. The maximum for chat interactions is 12; emails, 25; work items, 25, and
|
| Req Contact |
Disables continual automatic routing of digital contacts When Req Contact is Off, contacts are routed automatically to the agent until the agent has accepted the maximum number of concurrent contacts you configured or the queue is empty. Even if the agent refuses a contact, the agent continues to receive more contact requests as long as contacts are in the queue and the threshold has not been met. |
| Auto-focus | When On, the agent application automatically shifts the agent's view to the new contact when it is first connected to the interface. |
| Total Contact Count | The maximum number of total contacts an agent on the team can handle at a time. For example, if you set Chats to 5, Emails to 5, and Total Contact Count to 7, the agent would receive a maximum of seven contacts at any given time. Up to five of those seven contacts could be chat contacts and up to five of them could be email contacts. |
-
Click the app selector
and select Admin. -
Click Teams.
- Click the team you want to set up with OSH to open it.
- Click the Contact Settings tab.
-
If you have granular options enabled, set the Delivery Mode in Team Defaults to Omnichannel or Single Contact.
-
If chats and cases are routed to your agents using Salesforce External Routing, set the default number of Chats and Emails to Off. Otherwise, move to the next step.
-
If your agents are using MAX or Agent for Salesforce with CXone routing, set the default number of concurrent interactions for Chats and Emails. Set the default number of concurrent interactions for SMS (only supported in Agent for Salesforce Lightning)
-
Set the Total Contact Count to the maximum number of interactions of any type you want agents on the team to handle concurrently.
-
Toggle on the Request Contact and Auto-focus options to change the experience agents have in the agent application as needed.
- If you want any agents on the team to have different settings, you can modify them by selecting Custom instead of Default for that agent and then entering a new value for the setting. Settings at the agent level override settings at the team level. Alternatively, you can configure those settings in the ACD User profile.
- Click Done.