

Create Views
Views allow you to control access to interaction and employee data. Interaction data includes chat transcripts or recordings. Employee data includes user information. Only employees you assign to a view have access to the data specified in the view. Each view can manage access to one type of data. The default setting allows users to view all the data available. By assigning a view to a user, you are removing their access to all data except what is specified in the view.
- Click the app selector
 and select Admin.
 - Go to Security > Views.
- Click New View.
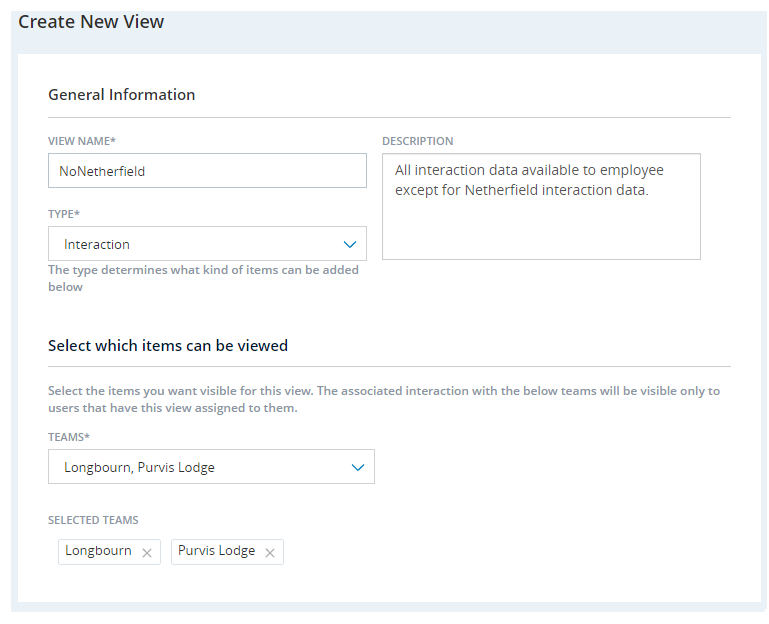
- Enter a View Name and, optionally, a Description.
-
Select the Type of data you want to restrict access to.
 Learn more about fields in this step
Field Details Interaction Select to restrict access to data related to interactions, such as recordings and chat transcripts. Role Select to restrict access to data related to roles, such as Supervisors or Agents User
Select to restrict access to data related to other employees in your organization, such as their names.
- If you selected Interactions, you can create a view by selecting Teams orSkills in the Interactions From field.
- If you selected Users, you can create a view by selecting Teams or Scheduling Units, or Roles in the Users From field.
- In the Teams drop-down, select each team whose data you want employees to be able to access when they are assigned to this view.
- Click Create.
Assign Views to Employees
- Click the app selector and select Admin.
- Click Employees.
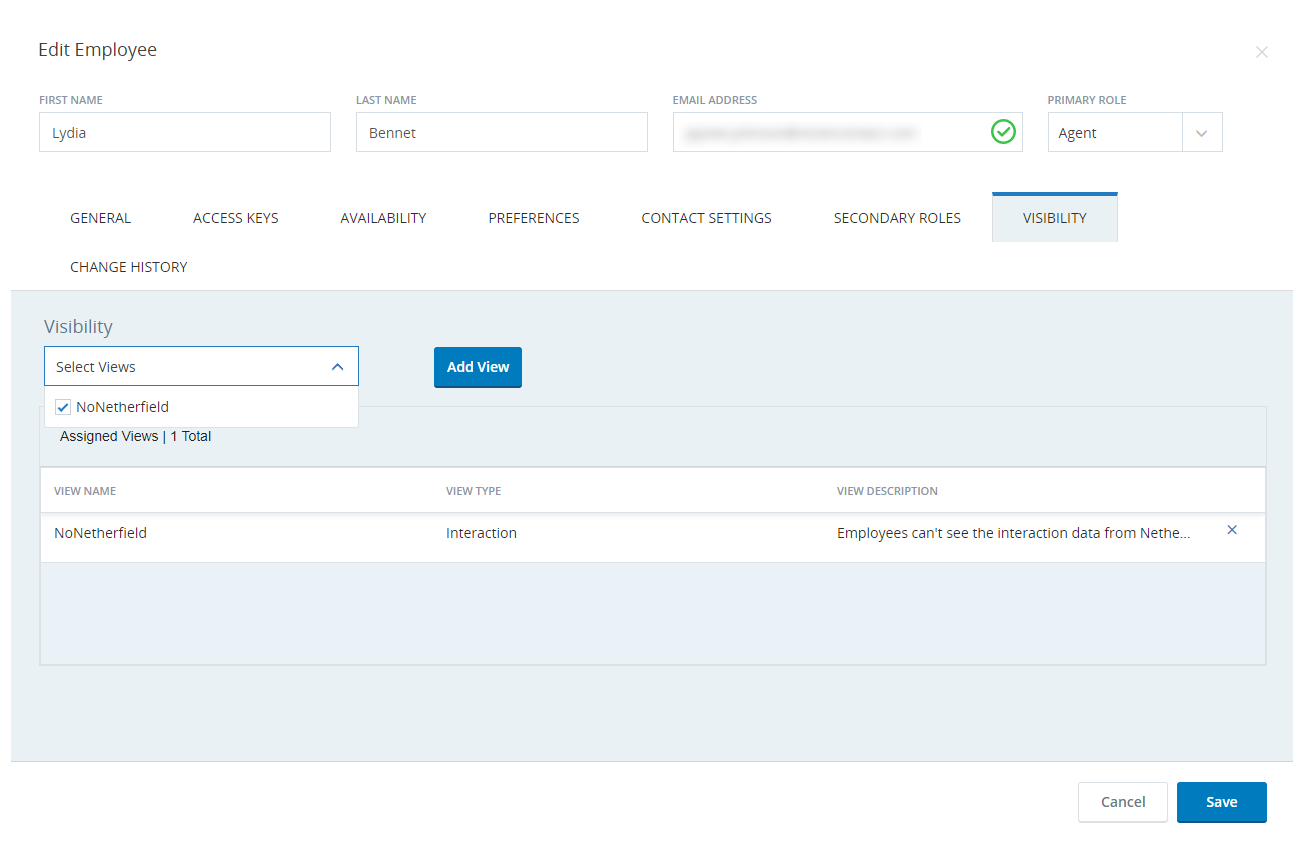
- Locate the employee you want to assign to a view to. Click to open the employee profile.
- Click Visibility.
-
In the Select Views drop-down, select the views you want to give the employee.
- Click Add View.
- Click Save.
- Continue assigning views to employees as needed.
Manage Access to ACD Data
See Manage Access to ACD Data to manage access to ACD-related data.